
Introduction to Gorilla Photography in Uganda
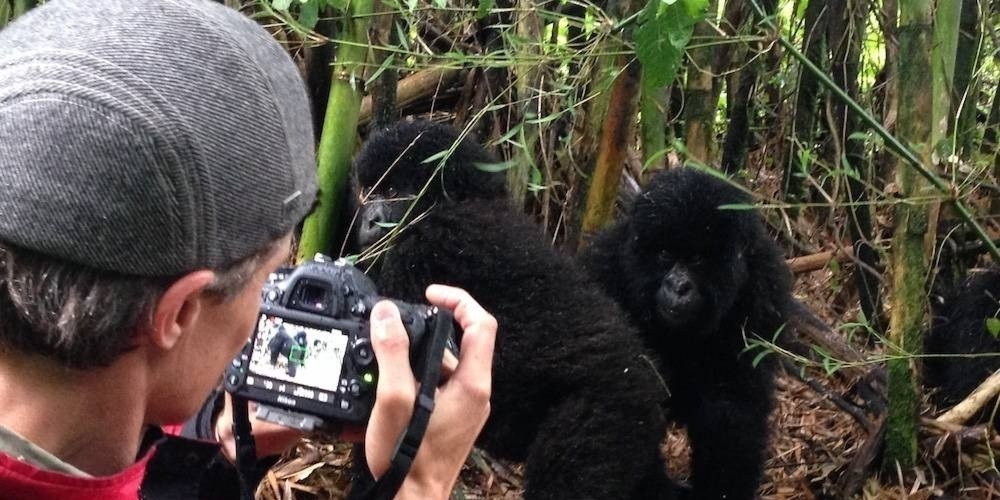
Capturing intimate moments with Uganda’s mountain gorillas.
Gorilla photography in Uganda offers wildlife photographers the opportunity to document one of Africa’s most remarkable primates within its natural mountain-forest environment. Uganda is home to mountain gorillas in Bwindi Impenetrable National Park and Mgahinga Gorilla National Park, making the country one of the principal destinations for observing and photographing these animals. Uganda Wildlife Authority identifies Bwindi and Mgahinga as Uganda’s two mountain gorilla destinations, while Bwindi is divided into the Buhoma, Ruhija, Rushaga, and Nkuringo trekking sectors.
For photographers, however, a gorilla trek is much more than an opportunity to obtain a close wildlife portrait. It is an exercise in observation, patience, composition, technical control, and responsible wildlife photography. The photographer must work within the conditions of a dense mountain rainforest, adapt to changing natural light, photograph through vegetation, respond to unpredictable animal movement, and follow the instructions established by guides and park authorities.
The Mountain Gorilla Photography in Uganda guide provides additional practical background on photographing mountain gorillas, including the challenges created by forest conditions, rain, vegetation, changing light, and the need to prepare appropriate camera equipment.
What Is Gorilla Photography?
Gorilla photography is the practice of photographing mountain gorillas and their surrounding environment while observing responsible wildlife-viewing procedures. It can include close portraits, environmental photographs, family-group images, behavioral sequences, habitat photographs, and documentary images showing the wider gorilla trekking experience.
Unlike controlled studio photography, gorilla photography takes place in a constantly changing natural environment. The photographer cannot arrange the position of the animal, control the background, move vegetation, adjust the lighting, or ask the gorilla to repeat a particular behavior. Strong results therefore depend on preparation and the ability to adapt to whatever happens naturally in the forest.
Why Uganda Is Important for Gorilla Photography
Uganda is especially important for mountain gorilla photography because the country protects mountain gorillas in two national parks. Uganda Wildlife Authority states that more than half of the world’s mountain gorilla population is found in Uganda’s Bwindi Impenetrable National Park and Mgahinga Gorilla National Park.
Bwindi provides several distinct trekking sectors, while Mgahinga forms part of the Virunga mountain landscape. This creates different photographic environments rather than one uniform gorilla photography destination.
For photographers, the differences in terrain, vegetation, elevation, access, weather, and available trekking sectors can influence how the photographic experience feels. Choosing where to trek should therefore be considered alongside the photographer’s goals, physical preparation, equipment, and desired photographic style.
Bwindi Impenetrable National Park and Gorilla Photography
Bwindi Impenetrable National Park is the most prominent gorilla trekking destination in Uganda. Uganda Wildlife Authority describes it as a biologically diverse rainforest in southwestern Uganda and identifies four main gorilla trekking sectors: Buhoma, Ruhija, Rushaga, and Nkuringo.
For photographers, Bwindi presents a particularly interesting environment because the gorillas are encountered within dense forest rather than in open savannah. Vegetation can become part of the composition, sometimes partially obscuring the animal and at other times creating natural frames around the subject.
The forest environment can also create difficult photographic conditions. Light may vary considerably between exposed areas and shaded sections beneath the canopy. Rain and moisture can appear unexpectedly, while steep terrain and dense vegetation can restrict the photographer’s movement.
These challenges are not simply obstacles. They are part of what gives gorilla photography its distinctive visual character.
Mgahinga Gorilla National Park and Gorilla Photography
Mgahinga Gorilla National Park provides another opportunity for gorilla photography in Uganda. The park lies within the Virunga Mountains and is one of the two Ugandan protected areas where mountain gorillas occur.
The mountain environment provides a different photographic setting from the broader experience of Bwindi. Photographers can encounter steep terrain, changing elevations, forest vegetation, and dramatic mountain landscapes as part of the wider visual story.
A photographer interested in documenting more than individual gorilla portraits can therefore use the landscape around Mgahinga to establish a sense of place and show the relationship between the animals and their mountain habitat.
Gorilla Photography Is More Than Taking Portraits
A common mistake among first-time wildlife photographers is to define success entirely by whether they obtain a sharp close-up of a silverback. A strong gorilla photography portfolio can be much broader.
Photographs can document an entire sequence of experiences: entering the forest, walking through the vegetation, observing the habitat, finding signs of gorilla activity, locating the family, photographing individual animals, recording social behavior, and showing the surrounding environment.
This approach produces a photographic story rather than a collection of isolated animal portraits.
Mountain Gorilla Portrait Photography
Portraits remain one of the most compelling forms of gorilla photography. A well-composed portrait can reveal facial structure, eyes, fur texture, posture, and individual character while retaining enough environmental context to establish that the photograph was made in a natural habitat.
The photographer should not attempt to force a portrait. The strongest expression may last only briefly, and the animal may change position without warning. Good preparation allows the photographer to respond quickly when a useful composition naturally appears.
Environmental Gorilla Photography
Environmental photographs place the gorilla within its surroundings. Instead of filling the entire frame with the animal, the photographer may include vegetation, tree trunks, foliage, terrain, or atmospheric conditions.
This type of photograph is particularly valuable for conservation storytelling because it communicates not only what the animal looks like but also where it lives.
Environmental photography can also solve a common problem in dense forests: rather than treating vegetation as something that must always be removed from the composition, photographers can deliberately incorporate it into the image.
Photographing Gorilla Behavior
Gorilla behavior provides some of the most meaningful opportunities for photography. Feeding, grooming, resting, moving, climbing, social interactions, and family behavior can all contribute to a photographic narrative.
Behavioral photography requires patience. Instead of photographing every movement, watch the animals and anticipate what may happen next. This allows the photographer to prepare composition and focus before the decisive moment occurs.
Photographing Gorilla Families
Gorillas live in social groups, making family photography an important part of documenting their lives. A photographer should therefore look beyond the dominant silverback and pay attention to females, juveniles, infants, and interactions between different members of the group.
A family sequence can provide greater storytelling value than a portfolio consisting entirely of individual portraits.
Why Forest Conditions Matter to Photographers
Gorilla photography takes place in a mountain rainforest environment where conditions can change quickly. The photographer may encounter deep shade, bright openings in the canopy, rain, mist, wet vegetation, and uneven terrain during the same experience.
These conditions affect shutter speed, aperture, ISO, autofocus performance, exposure, lens selection, and camera handling. A photographer who understands these challenges before arriving in Uganda will be better prepared to respond without wasting valuable observation time.
Natural Light Is Central to Gorilla Photography
Unlike controlled wildlife photography environments, the photographer generally has to work with whatever natural light is available. There may be soft diffuse light beneath the canopy, directional sunlight through gaps in vegetation, or extremely low light in deeper sections of the forest.
Learning to recognize and use these conditions is therefore more important than expecting perfect lighting.
Rain Can Become Part of the Photograph
Rain is one of the defining challenges of rainforest photography, but it can also create distinctive images. Water droplets on vegetation, wet fur, mist, reflections, and darker atmospheric conditions can add depth to photographs.
The key is preparation. A photographer who protects the camera and keeps essential equipment accessible can continue working when weather conditions change rather than treating rain as an automatic end to the photographic opportunity.
Vegetation Is Both a Challenge and a Creative Element
Dense vegetation can obstruct the photographer’s view of a gorilla. Leaves, branches, vines, and stems may appear between the camera and the subject.
Rather than attempting to manipulate the environment, photographers should look for naturally occurring gaps and compositions. Foliage can create foreground layers, natural frames, depth, and a stronger sense of being inside the forest.
The Importance of Patience in Gorilla Photography
Wildlife photography rewards photographers who observe before pressing the shutter. Gorillas may remain still for a period before suddenly moving, feeding, interacting, or changing position.
Taking time to understand what the animal is doing can produce better photographs than continuously photographing without observing.
Gorilla Photography Requires Technical Preparation
Camera preparation matters because the photographic encounter is limited and unpredictable. Batteries, memory cards, lens selection, autofocus settings, exposure settings, and weather protection should be considered before entering the forest.
The Bwindi travel and preparation guide specifically highlights camera gear, spare batteries, memory cards, and camera protection as useful considerations for travelers preparing for the forest environment.
Why Lens Choice Matters
The appropriate lens can help photographers work effectively while maintaining the required distance from the gorillas. A versatile zoom lens can provide flexibility when the subject changes position, while a telephoto lens can help produce detailed photographs without requiring the photographer to approach the animal.
Lens selection should therefore be considered not only in terms of image quality but also in terms of flexibility, weight, low-light performance, and the conditions in which the equipment will be used.
Photography Should Never Override Gorilla Welfare
One of the most important principles of gorilla photography is that the photograph is never more important than the animal. Visitors must follow the instructions provided by guides and rangers and comply with the rules governing gorilla encounters.
Uganda Wildlife Authority’s current gorilla management guidelines state that gorilla tracking provides an opportunity to observe gorillas in their natural habitat and identifies designated entry points and the requirement to track with authorized guides and valid permits.
Photographers should therefore approach the experience as wildlife observation first and photography second.
Gorilla Photography and Conservation
Photography can contribute to conservation by helping audiences understand mountain gorillas and their habitat. A powerful photograph can encourage interest in wildlife protection, responsible tourism, forest conservation, and the communities surrounding protected areas.
Uganda Wildlife Authority also operates a revenue-sharing system associated with gorilla tourism, with funds supporting community projects around Bwindi. The authority explains that revenue-sharing funds can support projects intended to improve livelihoods and reduce human-wildlife conflict.
This means that a gorilla photography story can extend beyond the animal itself and communicate the wider conservation landscape.
Photography Should Include the Habitat
A mountain gorilla does not exist separately from its forest. The trees, vegetation, terrain, weather, elevation, and surrounding ecosystem form part of the animal’s story.
Including habitat photographs in a gorilla photography project helps audiences understand why protecting the forest is inseparable from protecting the gorillas.
Gorilla Photography and Responsible Tourism
Responsible gorilla photography requires respect for wildlife, the environment, guides, rangers, trackers, other visitors, and local communities. The photographer should work within established rules rather than attempting to create a more dramatic encounter.
Current Uganda Wildlife Authority guidance is particularly important because operational rules and management procedures should take priority over older online photography advice. Photographers should always follow the instructions given during their actual trek.
What Makes Gorilla Photography Different From Ordinary Wildlife Photography?
Gorilla photography combines wildlife observation with a physically demanding forest experience. The photographer is not simply waiting beside a road or sitting in a vehicle. The photographic equipment must be carried through forest terrain, protected from moisture, and operated while moving through changing conditions.
The encounter itself is also unpredictable. The photographer cannot guarantee a particular pose, background, light level, or behavior. This makes preparation important but flexibility even more important.
Gorilla Photography for Beginners
Beginners do not need the most expensive camera system to learn the principles of gorilla photography. Understanding exposure, focus, shutter speed, aperture, ISO, composition, and responsible wildlife behavior is more important than simply purchasing increasingly expensive equipment.
A beginner should practice operating the camera before the trek so that basic controls can be changed quickly without spending valuable observation time looking through menus.
Gorilla Photography for Experienced Photographers
Experienced photographers may approach the trek with more advanced objectives, such as building a conservation portfolio, producing a behavioral sequence, creating environmental portraits, or developing a professional wildlife photography collection.
Even experienced photographers should remember that technical expertise does not override wildlife regulations. The forest remains a natural environment, and the photographer must adapt to the rules and conditions of the encounter.
Gorilla Photography as a Complete Visual Story
The strongest long-form gorilla photography projects usually contain variety. A sequence might begin with a landscape, introduce the forest, show the trekking experience, reveal signs of gorilla activity, present the family group, capture individual portraits, document behavior, and conclude with conservation or community context.
This storytelling approach gives the viewer a better understanding of the experience than a gallery containing dozens of similar close-up portraits.
What Photographers Should Expect From a Gorilla Trek
Uganda Wildlife Authority states that gorilla trekking takes place in Bwindi and Mgahinga and that treks can last approximately two to seven hours depending on circumstances, while the observation period with a habituated gorilla family is one hour.
For photographers, this means the overall trek and the actual gorilla observation period should be treated as two different photographic opportunities. The walk through the forest can provide landscapes, vegetation, birds, insects, trails, and other environmental photographs, while the gorilla encounter provides the primary wildlife photography opportunity.
Why Preparation Determines Photographic Success
The best gorilla photographs are rarely produced by chance alone. Preparation allows the photographer to react quickly when an animal moves into good light, turns toward the camera, interacts with another gorilla, or becomes visible through an opening in the vegetation.
Preparing equipment, understanding camera settings, learning the environment, and knowing the applicable rules all increase the photographer’s ability to concentrate on the encounter itself.
The Role of the Guide in Gorilla Photography
Guides and rangers are essential to the trekking experience. They understand the forest, follow gorilla movements, communicate instructions, and help visitors navigate the environment.
Photographers should listen to their guidance rather than allowing photographic objectives to determine where or how the group moves.
Gorilla Photography Should Begin With Observation
Before thinking about the perfect photograph, observe the environment. Look at where the light is coming from, identify potential backgrounds, notice where the animals are moving, and watch the behavior of the family.
This observational approach can help photographers anticipate opportunities instead of reacting too late.
The Ultimate Purpose of Gorilla Photography
The purpose of gorilla photography is not simply to collect attractive images. At its best, photography can document wildlife behavior, communicate the beauty of mountain forests, support conservation storytelling, educate audiences, and preserve memories of an extraordinary encounter.
The photographer’s responsibility is to achieve these objectives without compromising the welfare of the animals or the integrity of their habitat.
What This Gorilla Photography Guide Covers
This complete guide is designed to take the photographer from initial planning through the final photograph. It covers where to photograph gorillas in Uganda, when to go, camera and lens selection, camera settings, clothing and packing, field photography techniques, difficult lighting conditions, composition, behavioral storytelling, ethics, trekking logistics, post-processing, file management, itineraries, professional recommendations, and frequently asked questions.
The result should be more than a simple gorilla trekking article. It should function as a practical gorilla trekking resource for photographers who want to understand both the photographic and conservation dimensions of the experience.
Gorilla Photography: The Right Mindset
The most useful mindset for gorilla photography is to expect the unexpected. The forest may be darker than anticipated. Rain may arrive. Vegetation may obscure the animal. A gorilla may move immediately after the camera is raised. Another family member may suddenly become the most interesting subject.
Instead of trying to control these circumstances, the photographer should learn to work with them.
That is what makes gorilla photography in Uganda so distinctive. The photographer enters an ancient mountain forest, encounters wild mountain gorillas under carefully managed conditions, and attempts to translate a brief and unpredictable encounter into photographs that communicate what was seen without compromising the animals that made the experience possible.
Information not found in current search results: a scientifically established camera model, lens, aperture, shutter speed, or ISO setting that is universally best for every gorilla photography encounter. Those choices depend on the available light, subject movement, camera equipment, lens characteristics, and the photographer’s creative objective.
Best Places for Gorilla Photography in Uganda
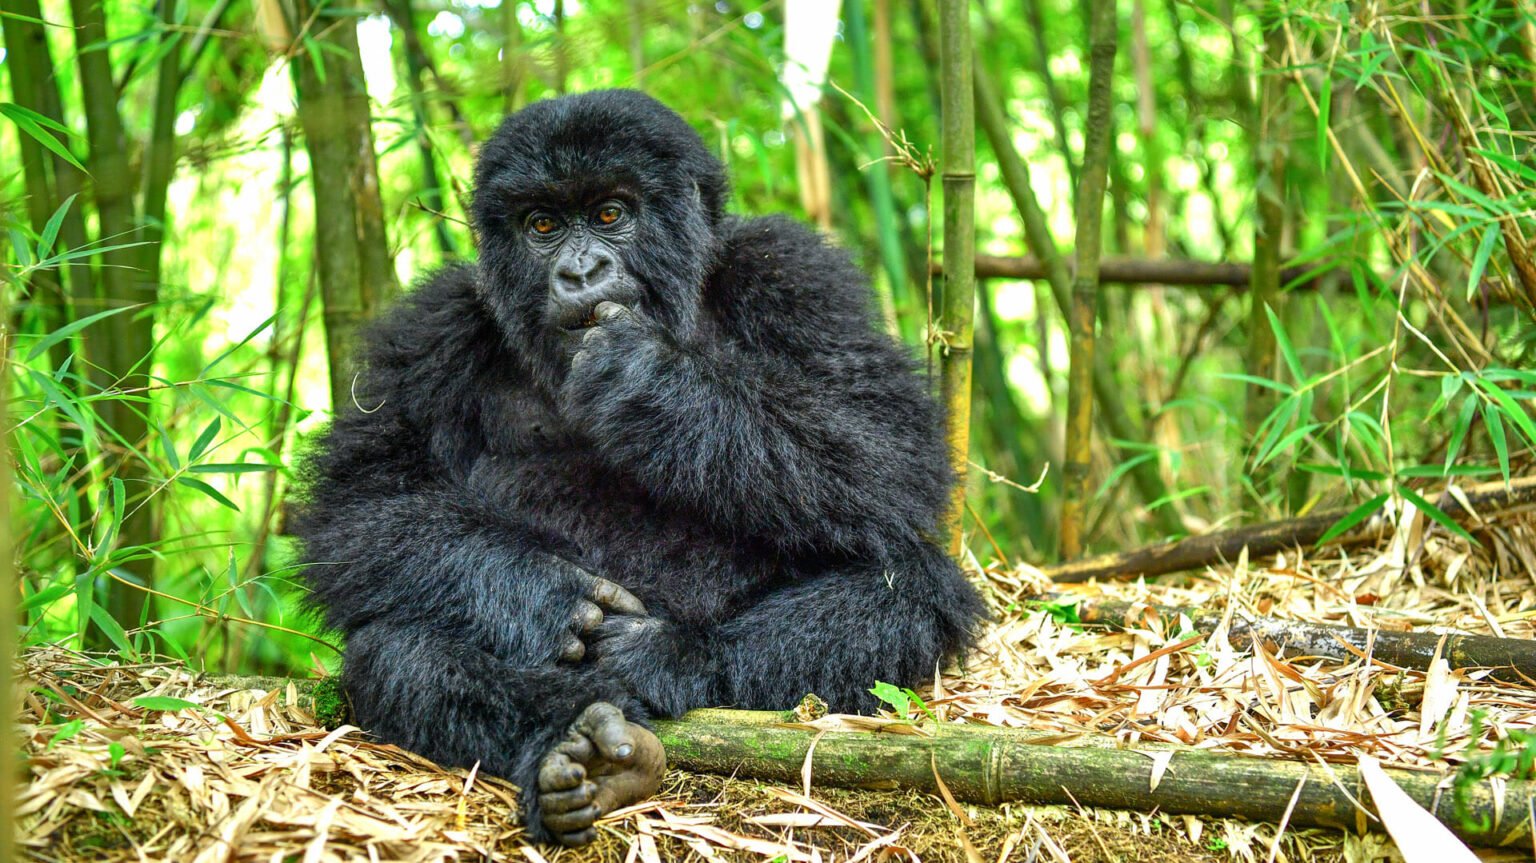
A juvenile gorilla pauses amidst the light-filled bamboo zones of Mgahinga.
Choosing the best place for gorilla photography in Uganda is primarily a question of matching the photographer’s objectives with the characteristics of the available gorilla trekking locations. Mountain gorilla trekking in Uganda takes place in Bwindi Impenetrable National Park and Mgahinga Gorilla National Park. Uganda Wildlife Authority identifies four designated gorilla-tracking entry points in Bwindi—Buhoma, Ruhija, Nkuringo, and Rushaga—and Ntebeko/Muhavura in Mgahinga.
For photographers, this distinction matters because the location determines the forest environment, terrain, access arrangements, trekking experience, and opportunities to photograph gorillas within their natural surroundings. There is no single sector that can be described as universally best for every photographer. The strongest choice depends on whether the priority is environmental photography, portraits, family behavior, landscape context, accessibility, or combining gorilla photography with a broader Uganda safari.
The Uganda mountain gorilla photography guide can be used alongside current Uganda Wildlife Authority information when preparing for a photography-focused visit.
Bwindi Impenetrable National Park
Bwindi is the principal gorilla photography destination in Uganda and is divided into four main trekking sectors: Buhoma, Ruhija, Rushaga, and Nkuringo. Uganda Wildlife Authority describes Bwindi as the country’s most popular gorilla trekking location and notes that it contains roughly half of the world’s mountain gorilla population.
For photographers, Bwindi’s greatest advantage is the diversity of photographic environments within one protected forest. The different sectors provide access to different parts of the forest and surrounding landscapes, allowing a photographer to choose an experience that fits the wider purpose of the trip.
Bwindi is particularly suitable for photographers who want to combine intimate gorilla portraits with environmental photographs showing the dense vegetation and mountainous forest in which the animals live.
Buhoma Sector
Buhoma is one of Bwindi’s designated gorilla-tracking sectors and is located in the northern part of the park. It is one of the best-known starting points for gorilla trekking in Uganda.
For gorilla photographers, Buhoma can be particularly useful when the goal is to build a broader visual story around the trekking experience. The forest environment allows photographs to move beyond close animal portraits and include vegetation, trails, forest atmosphere, and the wider experience of entering Bwindi.
The northern location can also be relevant when planning a wider itinerary that includes Queen Elizabeth National Park and the Ishasha area. Uganda Wildlife Authority notes that the route through Ishasha provides an opportunity to combine travel toward Bwindi with wildlife viewing in Queen Elizabeth National Park.
What Makes Buhoma Interesting for Photographers?
The major photographic strength of Buhoma is the opportunity to tell a complete forest story. A photographer can document the transition from the surrounding landscape into the rainforest, the trekking experience, and eventually the gorilla encounter.
This makes the sector particularly useful for photographers who are producing a documentary-style travel story rather than simply trying to collect close-up gorilla portraits.
Photographers should nevertheless avoid assuming that a particular sector guarantees a specific photographic composition. Gorilla movements are naturally variable, and the precise encounter depends on the gorilla family being tracked and conditions on the day.
Ruhija Sector
Ruhija is one of the four designated gorilla-tracking sectors in Bwindi and lies in the eastern part of the park. Uganda Wildlife Authority’s current information confirms Ruhija as an official gorilla-tracking entry point.
Ruhija is particularly interesting for photographers who value the broader forest environment. The eastern part of Bwindi provides opportunities to photograph the relationship between gorillas and their montane forest habitat while also experiencing the wider biodiversity of the area.
For photographers building a portfolio rather than simply seeking one hero photograph, the surrounding environment can be just as important as the gorilla encounter itself.
Why Consider Ruhija for Gorilla Photography?
Ruhija can work well for photographers interested in combining gorilla photography with forest and bird photography. The wider Ruhija environment is known for its forest biodiversity, providing opportunities to build a more diverse photographic project around the destination.
The sector can therefore appeal to photographers who want their Uganda trip to contain several interconnected photographic subjects rather than concentrating exclusively on gorillas.
Rushaga Sector
Rushaga is one of Bwindi’s southern gorilla-tracking sectors and is an officially designated entry point for gorilla tracking.
The sector is important for photographers because the southern part of Bwindi can be incorporated into itineraries using Kisoro as an access point. Uganda Wildlife Authority notes that the southern sectors, including Rushaga and Nkuringo, can be reached through the Kisoro area, with road transfers continuing toward the relevant trailheads.
Rushaga is also associated with gorilla habituation experiences. This can be particularly relevant to photographers interested in longer observation and more extensive behavioral documentation, provided the specific activity and current availability meet their objectives and all applicable regulations are followed.
Gorilla Photography Opportunities in Rushaga
The southern forest environment can provide strong opportunities for environmental portraits, behavioral photography, and photographic storytelling.
For a photographer planning a longer project, the southern sectors can also be attractive because the trip can be structured around both gorilla photography and the landscapes around the Kisoro region.
However, photographers should not assume that longer observation automatically means better photographs. More time provides more opportunity to observe, but the quality of the resulting images still depends on behavior, light, vegetation, composition, and photographic technique.
Nkuringo Sector
Nkuringo is another designated gorilla-tracking sector in southern Bwindi. Uganda Wildlife Authority lists Nkuringo among the park’s four official Bwindi gorilla-tracking entry points.
Nkuringo is particularly relevant for photographers who want to combine gorilla photography with dramatic mountain and landscape imagery. The area around southern Bwindi provides a strong setting for environmental storytelling, especially when the photographic project includes both the forest and surrounding highland landscapes.
Why Nkuringo Can Appeal to Landscape-Oriented Photographers
Photographers who enjoy both wildlife and landscape photography may find Nkuringo useful for building a varied visual portfolio. The surrounding terrain creates opportunities to photograph the relationship between mountain forests, agricultural landscapes, settlements, and distant volcanic or highland scenery where conditions permit.
Such images can provide context for the gorilla photographs and help communicate the geographic setting of the conservation landscape.
Mgahinga Gorilla National Park
Mgahinga Gorilla National Park provides Uganda’s second mountain gorilla trekking destination. It lies within the Virunga Mountains and is officially managed as one of Uganda’s national parks by Uganda Wildlife Authority.
For photographers, Mgahinga offers an alternative to the larger Bwindi forest environment. The park’s mountain setting can make landscape context especially important, allowing a photographic project to combine gorillas with volcanic mountain scenery and high-altitude forest.
Why Consider Mgahinga for Gorilla Photography?
Mgahinga can be a strong choice for photographers who want to combine mountain gorilla photography with a broader Virunga landscape story.
The visual character of a photographic project can therefore extend beyond the gorilla itself. Mountains, forest, vegetation, mist, trails, and changing weather can all help establish a stronger sense of place.
Ntebeko and the Mgahinga Tracking Area
Uganda Wildlife Authority’s current gorilla management guidelines identify Ntebeko/Muhavura Visitor Information Centre as a designated entry point for gorilla tracking in Mgahinga.
Photographers should use the designated entry point and follow the instructions of authorized guides and rangers. The current UWA guidelines specifically state that gorilla tracking should take place through designated entry points and with authorized guides and valid permits.
Bwindi or Mgahinga: Which Is Better for Photographers?
There is no evidence supporting a universal ranking in which one Ugandan gorilla destination is always better for photography than the other. The two destinations offer different environments and different logistical considerations.
Bwindi provides four established trekking sectors and a broad range of forest settings. Mgahinga offers a smaller mountain-forest setting within the Virunga landscape. The best choice therefore depends on the type of photographic project being planned.
Best Destination for Gorilla Portraits
Photographers focused primarily on portraits should concentrate less on trying to identify a supposedly perfect sector and more on preparing for the actual conditions of the encounter.
A sharp, well-composed gorilla portrait depends on the animal’s position, available light, vegetation, photographer position, lens, focus accuracy, and timing. These factors can vary considerably even within the same sector.
The gorilla photography tips resource can complement this section when preparing specifically for portrait photography.
Best Destination for Environmental Gorilla Photography
Photographers interested in environmental images should consider the wider landscape and forest setting rather than focusing exclusively on close encounters.
Bwindi’s dense rainforest and the mountainous landscapes surrounding its sectors can provide strong opportunities for environmental storytelling. Mgahinga can also be valuable for photographers who want to incorporate the Virunga mountain landscape into their gorilla photography project.
Best Destination for Behavioral Photography
Behavioral photography depends primarily on the animals and circumstances encountered rather than a guaranteed sector-specific behavior.
Photographers should therefore prioritize preparation, patience, and observation. A photographer who understands the camera settings and watches the gorilla family carefully will generally be better positioned to document naturally occurring behavior.
Best Destination for a Broader Wildlife Photography Trip
Photographers planning a larger Uganda wildlife project may want to choose a gorilla sector based partly on the other protected areas and photographic subjects they intend to include in their itinerary.
Buhoma can be combined logically with travel through the northern side of the Bwindi region and routes associated with Queen Elizabeth National Park, while southern Bwindi sectors can fit naturally into itineraries using the Kisoro area. Uganda Wildlife Authority provides route information for access to the different Bwindi sectors.
Best Location for a Gorilla Photography Portfolio
A portfolio does not necessarily require several gorilla destinations. A single well-planned trek can produce a diverse set of photographs if the photographer approaches the experience as a visual story.
Portraits, environmental photographs, family interactions, behavioral sequences, forest details, trekking scenes, and landscape photographs can all contribute to a complete collection.
Why the Gorilla Family Matters More Than the Sector Name
Gorilla photography opportunities are influenced heavily by the particular family encountered. The composition of the group, its movements, the behavior of individual animals, and where the family happens to be within the forest all affect the photographic experience.
Uganda Wildlife Authority’s current guidelines explain that visitors are allocated to specific gorilla family groups on the day of tracking within the designated sectors.
This means photographers should avoid making promises about exactly which gorilla, pose, behavior, or photographic opportunity they will obtain.
Why Gorilla Movement Makes Sector Comparisons Difficult
Gorillas are not stationary photographic subjects. Their movements through the forest mean that conditions can change rapidly during a trek.
A location that appears ideal at the beginning of an encounter may become difficult minutes later if the animals move deeper into vegetation or into darker conditions. Conversely, a challenging position can suddenly produce an exceptional photograph when the gorilla moves into a clear opening.
Access and Logistics Should Influence Your Choice
Photographers carrying cameras, lenses, batteries, rain protection, and other equipment should take access logistics seriously. Uganda Wildlife Authority recommends appropriate vehicle access for Bwindi and provides separate route information for the northern and southern sectors.
Choosing a sector is therefore not only a photographic decision. Accommodation location, road conditions, transfer time, and the photographer’s physical preparation can all affect the overall experience.
Photography and Physical Terrain
Gorilla trekking takes place in mountainous forest environments and can involve uneven terrain. Uganda Wildlife Authority notes that gorilla trekking requires moderate fitness and that treks may last approximately two to seven hours depending on circumstances.
Photographers should account for the additional weight of camera equipment when preparing for the trek. A lightweight, practical setup can sometimes be more useful than carrying every piece of equipment available.
Choosing a Sector Based on Your Photographic Goal
Photographers interested primarily in the forest experience may prefer to investigate Buhoma or Ruhija. Those interested in southern Bwindi and the wider mountain landscape may consider Rushaga or Nkuringo. Photographers interested in a Virunga mountain setting can consider Mgahinga.
These are planning considerations rather than guarantees of photographic quality. Actual encounters remain dependent on natural conditions and current park arrangements.
Do Not Choose a Sector Solely Because of Online Photographs
Exceptional photographs published online can create the impression that a particular sector consistently produces a specific visual result. This can be misleading.
A photograph represents one moment under particular lighting, weather, animal behavior, camera settings, and photographer positioning. It should not be interpreted as a guarantee of what another visitor will experience.
Use Current Official Information When Planning
Sector names, entry arrangements, access routes, conservation procedures, and operational details can change. Photographers should therefore confirm current information with Uganda Wildlife Authority or their authorized safari operator before finalizing their plans.
Uganda Wildlife Authority’s current 2024 gorilla and chimpanzee management guidelines are particularly useful because they identify the designated tracking entry points and explain the basic framework for gorilla tracking in Uganda.
How to Choose the Best Gorilla Photography Location
Start by defining the photographic objective. If the priority is a broad documentary project, consider the overall landscape and trekking experience. If the priority is behavioral photography, prioritize adequate preparation and patience. If the objective is combining gorilla photography with other wildlife and landscapes, choose a sector that fits the wider itinerary.
Then consider logistics, physical requirements, accommodation, road access, and the amount of photographic equipment you intend to carry.
Final Comparison: Uganda’s Gorilla Photography Destinations
Bwindi is the most extensive option for photographers because it contains four main gorilla-tracking sectors: Buhoma, Ruhija, Rushaga, and Nkuringo. It offers varied forest environments and can support different styles of wildlife and environmental photography. Mgahinga provides an alternative mountain-gorilla setting within the Virunga Mountains and can be particularly appealing to photographers who want stronger mountain and landscape context.
Rather than asking which location guarantees the best photograph, the more useful question is which location best matches the photographer’s objectives, itinerary, physical preparation, and preferred photographic style.
For photographers planning a first gorilla photography trip, the most important preparation is therefore not simply selecting a famous sector. It is understanding the environment, carrying practical equipment, learning the camera before entering the forest, allowing the animals to behave naturally, and remaining flexible enough to photograph whatever conditions the forest provides.
Information not found in current search results: reliable evidence that any individual Ugandan gorilla-tracking sector consistently produces superior photographic results, specific gorilla poses, guaranteed lighting conditions, or guaranteed encounters with particular family groups. Such claims should not be presented as facts because wildlife conditions vary naturally.
Best Time for Gorilla Photography in Uganda
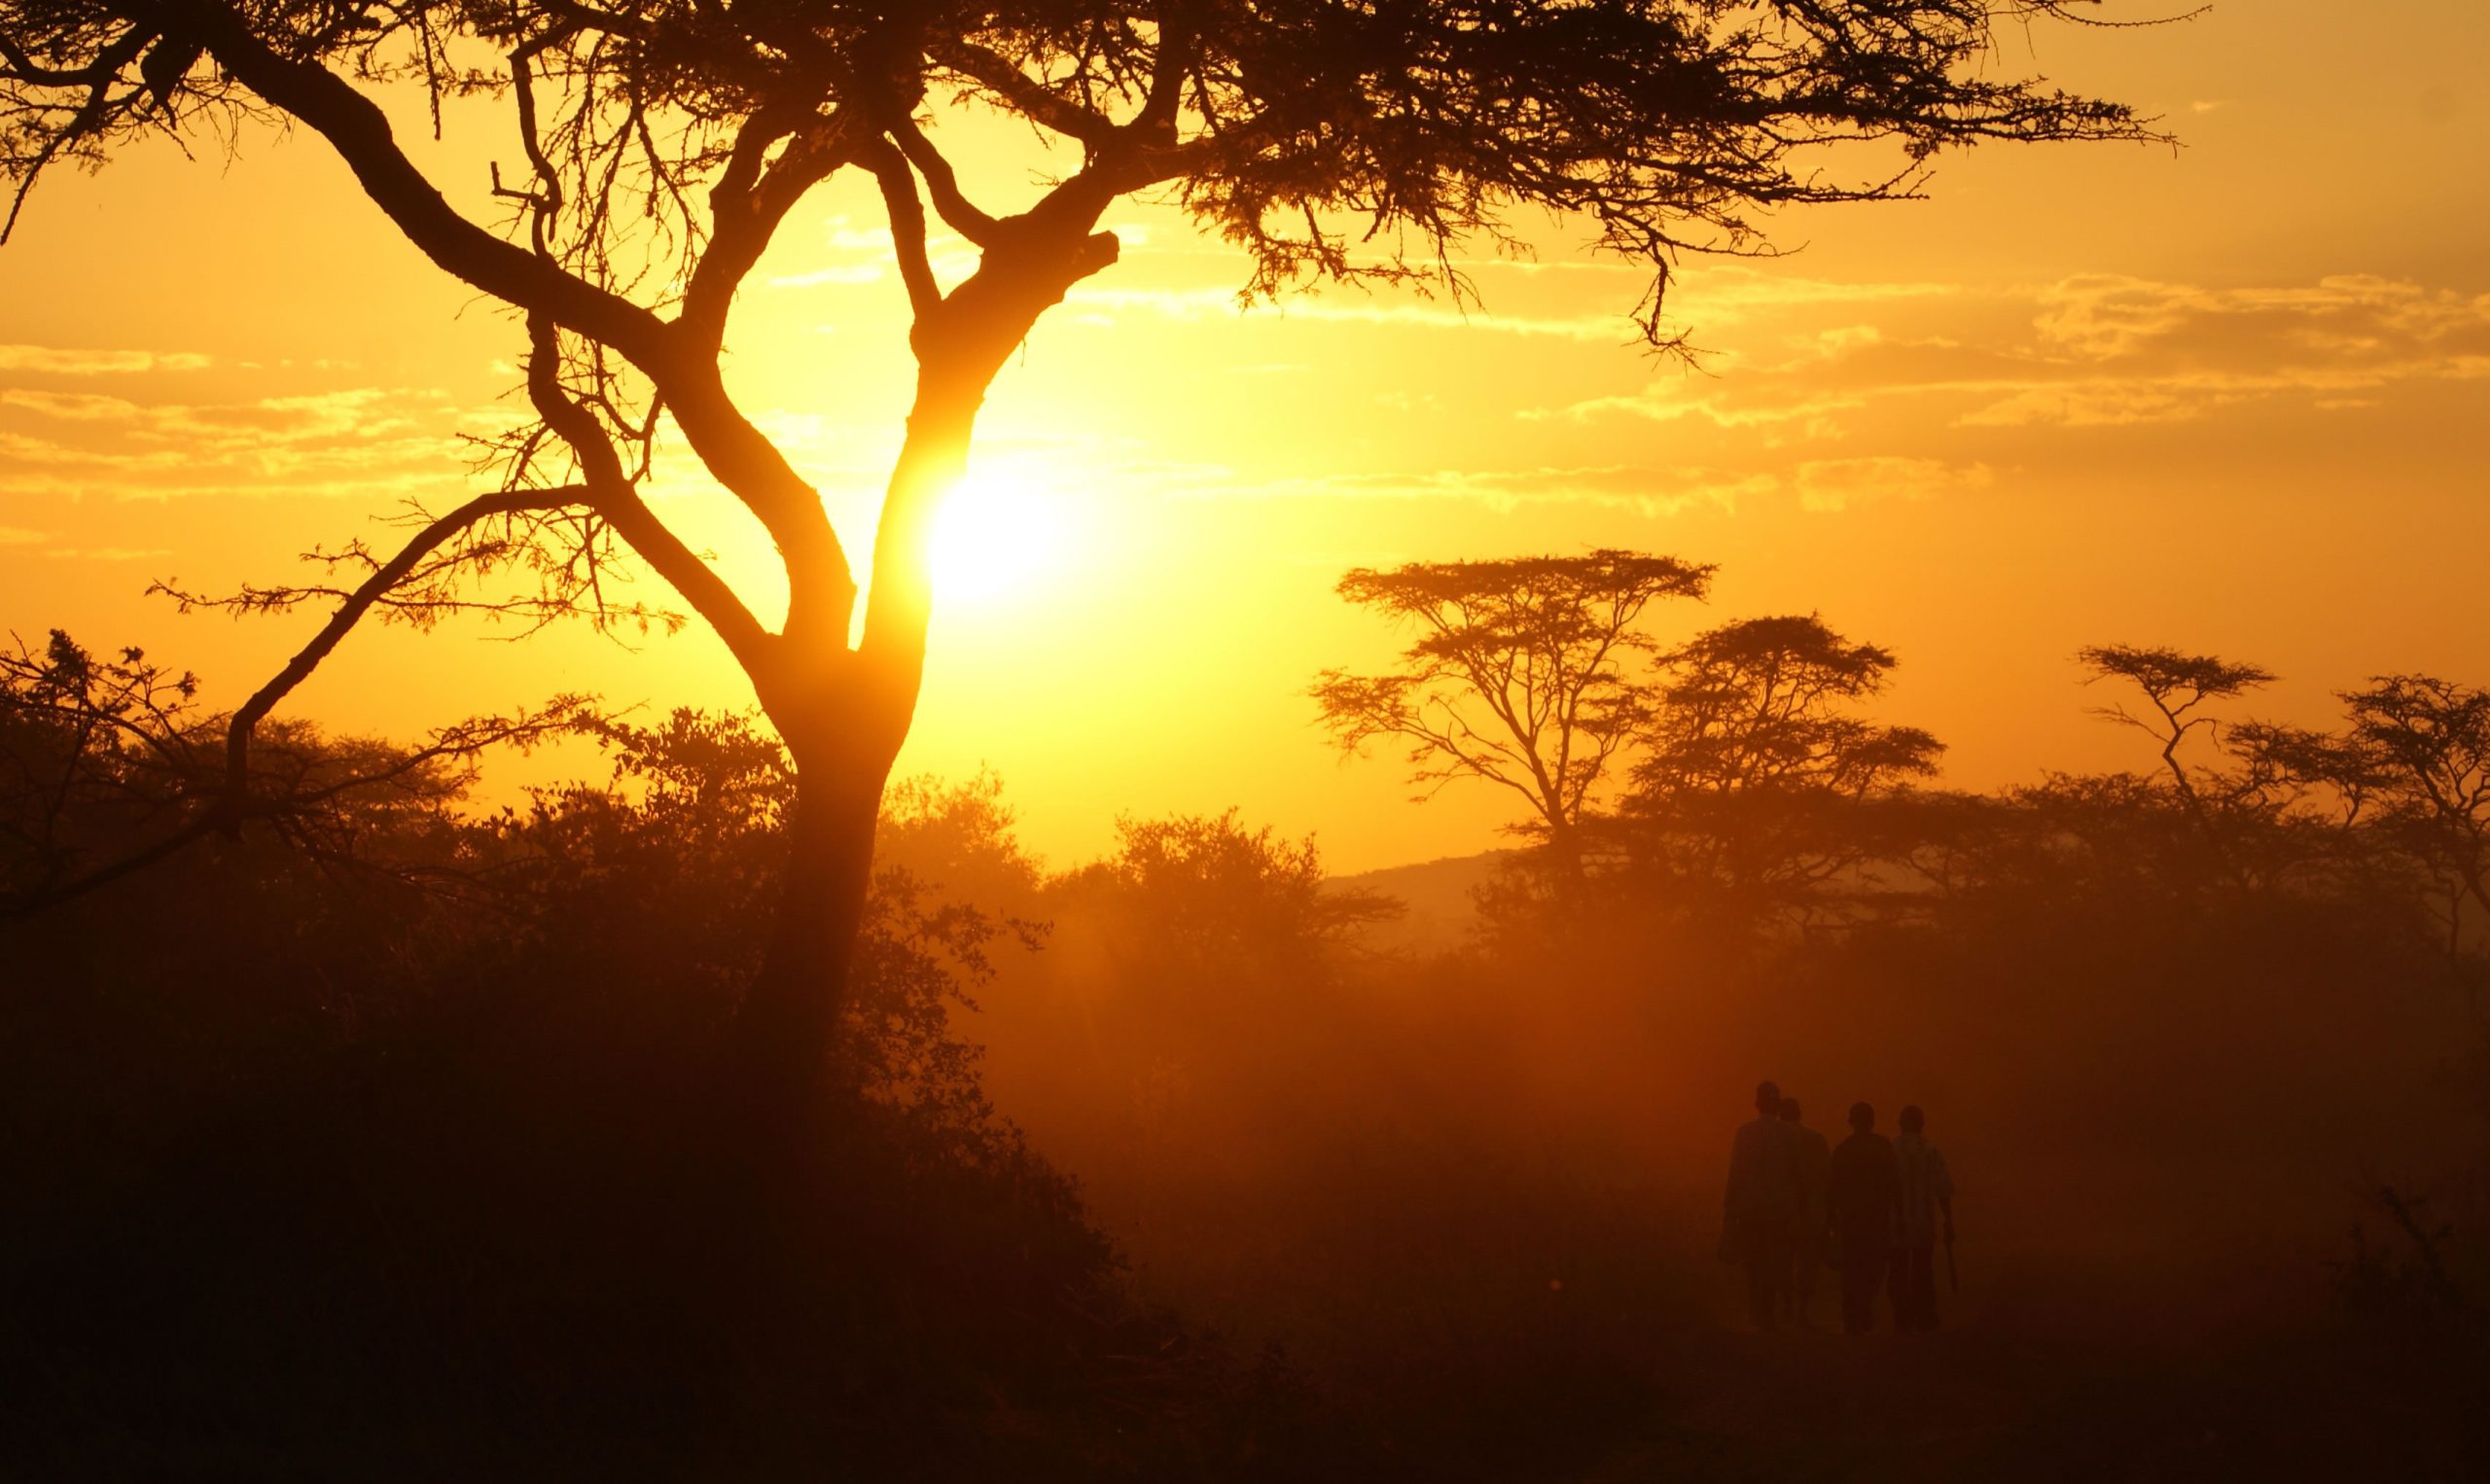
Capturing the golden hour during a Uganda trekking safari.
Choosing the best time for gorilla photography in Uganda requires more than simply identifying the months with the least rainfall. For photographers, timing affects the condition of forest trails, the amount and quality of natural light, moisture levels, visibility, vegetation, travel conditions, and the overall character of the images. Uganda’s mountain gorillas live in high-altitude rainforest environments, so changing weather is an important part of the photographic experience.
Gorilla trekking in Uganda takes place in Bwindi Impenetrable National Park and Mgahinga Gorilla National Park. Uganda Wildlife Authority states that gorilla treks can last approximately two to seven hours depending on circumstances, followed by one hour of observation with a habituated gorilla family.
For photographers, this means the best time for gorilla photography should be evaluated from several perspectives: weather, light, trekking conditions, forest atmosphere, equipment management, and the photographer’s preferred visual style.
What Is the Best Time for Gorilla Photography in Uganda?
There is no single month that can be scientifically guaranteed to produce the best gorilla photographs. Uganda’s mountain forests can experience changing weather even during comparatively drier periods. Uganda Wildlife Authority information describes Bwindi as having two rainy seasons and two dry seasons, while official park information also emphasizes that the forest can be cold and wet.
For photographers who prioritize easier trail conditions and generally lower rainfall, the drier periods are attractive. For photographers who enjoy mist, wet vegetation, atmospheric conditions, and lush rainforest imagery, wetter periods can also produce distinctive photographs.
The practical answer is therefore that the best time for gorilla photography depends on the photographer’s priorities rather than on a universal guarantee of photographic quality.
Understanding Uganda’s Gorilla Photography Seasons
Bwindi’s climate is influenced by its equatorial location and altitude. Uganda Wildlife Authority material identifies two rainy seasons and two dry seasons in Bwindi. The extended rainy season occurs around March to May, followed by a shorter dry period around June and July. A shorter rainy period occurs around August and September, followed by another dry period around December to February.
Mgahinga has a somewhat different local climate. Uganda Wildlife Authority material describes two dry seasons, December to February and May to August, with wetter conditions generally occurring during March to April and September to November.
These patterns provide useful planning guidance, but they should not be interpreted as rigid weather calendars. Rainfall and cloud conditions can vary within individual months.
Gorilla Photography During the Dry Seasons
The dry seasons can be appealing to photographers because reduced rainfall can make trekking conditions more manageable. Drier trails may make it easier to carry and operate camera equipment, particularly when photographers are using larger lenses or carrying additional batteries and accessories.
Uganda Wildlife Authority’s birding guidance identifies late May through September as a generally less rainy period for birding in Uganda and notes that June to August and December to February are important dry-season periods for wildlife viewing in savannah reserves.
However, these broader Uganda patterns should not be treated as a guarantee that Bwindi or Mgahinga will remain dry throughout a particular trek.
June and July Gorilla Photography
June and July fall within a relatively drier period in parts of Uganda and are often attractive months for visitors who want to reduce the likelihood of persistent heavy rainfall. Uganda Wildlife Authority material specifically identifies June and July as a shorter dry season in Bwindi.
For photographers, these months can provide a useful balance between rainforest conditions and trekking practicality. Nevertheless, the forest remains a wet environment, and photographers should continue carrying appropriate protection for cameras and lenses.
December to February Gorilla Photography
December to February represents another comparatively drier period. A Uganda Wildlife Authority project document describing Bwindi’s climate identifies the second dry season as December to February and describes it as the optimal period for gorilla trekking within that particular document, while also noting that occasional light rain can still occur.
This makes December, January, and February important months to consider for photographers who want to prioritize generally more manageable trekking conditions while still working in a lush rainforest environment.
Gorilla Photography During the Rainy Seasons
Rain should not automatically be considered a disadvantage for photography. In a rainforest environment, wet weather can produce atmospheric scenes that are difficult to reproduce during dry conditions.
Rain can darken foliage, create reflections on wet leaves, increase the visual richness of the forest, and produce misty backgrounds. Wet gorilla fur can also appear visually different from dry fur, although photographers should never allow the pursuit of a particular image to interfere with responsible wildlife viewing.
The disadvantage is primarily practical. Rain increases the need for camera protection, can make trails muddy, and may make equipment handling more difficult.
March to May Gorilla Photography
March to May includes the extended rainy period identified in Uganda Wildlife Authority material for Bwindi. The same source notes that consistent rainfall during this period can produce muddy conditions.
For photographers, this can mean more challenging trekking and equipment-management conditions. However, photographers who are comfortable working in rain may find the atmospheric character of the forest particularly rewarding.
August and September Gorilla Photography
Uganda Wildlife Authority material identifies August and September as a shorter rainy period in Bwindi, with rainfall described as less intense than during the extended March-to-May rainy season.
These months can therefore provide an interesting compromise between wet-season atmosphere and periods of reduced rainfall, although actual conditions vary.
October and November Gorilla Photography
Uganda’s wider climate information identifies heavier rainfall around September to November in Bwindi, while Mgahinga’s climate documentation identifies September to November as part of its wetter period.
Photographers considering these months should place greater emphasis on waterproofing, trail conditions, and flexible scheduling.
Weather and Natural Light for Gorilla Photography
Weather influences photography primarily through its effect on natural light. Dense forest already limits the amount of direct light reaching the forest floor, and overcast or rainy conditions can reduce illumination even further.
For photographers, this makes exposure management particularly important. A camera setting that works well during a brighter opening in the canopy may be inadequate several minutes later when the gorilla moves into deeper shade.
Why Overcast Weather Can Be Good for Gorilla Photography
Bright sunshine is not always ideal for wildlife portraits. Strong direct sunlight can create harsh highlights and deep shadows, especially across a gorilla’s dark fur.
Overcast conditions can provide softer, more diffuse illumination. This can help reduce extreme contrast and produce more even exposure across the subject.
For this reason, photographers should not automatically regard cloudy weather as poor photographic weather.
Why Rainforest Mist Can Improve a Photograph
Mist can add depth and atmosphere to forest photography. It can partially separate the subject from the background and emphasize the sense of place associated with a high-altitude rainforest.
However, mist also reduces visibility and contrast. Photographers should therefore treat it as a creative condition rather than assuming it will automatically improve every photograph.
Gorilla Photography in Bright Sunlight
When sunlight reaches the forest floor, the difference between bright areas and deep shade can become substantial. A gorilla positioned in a patch of sunlight may be strongly illuminated while surrounding vegetation remains considerably darker.
Photographers should be prepared to adjust exposure quickly and watch highlights carefully. The goal should be to retain useful detail without allowing bright areas to become excessively exposed.
Low-Light Gorilla Photography
Low light is one of the most important technical challenges of gorilla photography. The forest canopy can create conditions where shutter speeds become too slow for moving animals unless the photographer adjusts the camera settings appropriately.
This is why understanding shutter speed, aperture, ISO, and autofocus before the trek is essential. The photographer should be able to make adjustments quickly rather than experimenting with unfamiliar settings during the encounter.
How Rain Affects Camera Equipment
Rain increases the importance of protecting cameras, lenses, memory cards, and batteries. A photographer should plan for the possibility of wet conditions even when the weather forecast appears favorable.
Camera protection should be prepared before entering the forest rather than after rainfall begins. This reduces the need to expose equipment unnecessarily while trying to install protection in difficult conditions.
Rain and Gorilla Photography Composition
Rain can become part of the composition rather than merely something to avoid. Wet leaves can provide foreground texture, darker foliage can create stronger contrast, and droplets can communicate the rainforest environment.
The photographer should still prioritize clear visibility of the animal and avoid allowing rain or vegetation to overwhelm the main subject.
Best Time for Gorilla Photography for Beginners
Beginners may prefer a comparatively drier period because managing camera equipment, terrain, and exposure is already challenging without adding persistent heavy rain.
However, beginners should not assume that dry-season trekking eliminates difficult lighting. Dense rainforest can remain challenging even when there is little rainfall, so understanding camera settings remains essential.
Best Time for Gorilla Photography for Experienced Photographers
Experienced photographers may deliberately choose periods with more variable weather because they can offer greater creative variety. Mist, rain, cloud, wet foliage, and changing light can all contribute to a more atmospheric photographic series.
The choice should therefore be based on the intended portfolio rather than a simple assumption that dry weather always produces better photographs.
Best Time for Gorilla Photography for Portraits
Portrait photographers should prioritize conditions that allow consistent focus and exposure. Soft or diffused light can be useful because mountain gorillas have predominantly dark fur, which can create exposure challenges in strong contrast.
However, the actual position of the gorilla matters more than the calendar. A perfect photographic opportunity can occur during rain, cloud, or sunshine.
Best Time for Environmental Gorilla Photography
Photographers interested in environmental portraits may find wetter conditions particularly interesting because rain, mist, and saturated vegetation can strengthen the visual connection between the gorilla and its rainforest habitat.
Dry-season conditions can also be valuable because clearer visibility may allow more of the surrounding environment to appear in the frame.
Best Time for Gorilla Behavioral Photography
There is no verified month that guarantees better gorilla behavior for photographers. Gorilla families continue their natural activities throughout the year, and the specific photographic opportunities depend on what the animals are doing during the encounter.
Photographers should therefore avoid planning around claims that a particular month guarantees specific behaviors such as feeding, grooming, playing, or resting.
Best Time for Gorilla Photography and Bird Photography
Photographers combining gorilla photography with bird photography may also consider seasonal conditions. Uganda Wildlife Authority states that Uganda is suitable for birding throughout the year, while late May through September is generally less rainy and can be particularly favorable for birding.
This can make the broader May-to-September period interesting for photographers who want to combine forest wildlife photography with bird photography, although the optimal timing for birds and gorillas should be evaluated separately.
Best Time for Gorilla Photography and Landscape Photography
Landscape photographers may value different conditions from portrait photographers. Clearer weather can provide better distant views, while mist and clouds can create atmospheric mountain compositions.
Mgahinga is particularly relevant to this consideration because its three volcanoes create a distinctive mountain setting. Uganda Wildlife Authority material describes the park’s dramatic volcanic landscape and notes that mist and damp conditions are common during rainy periods.
Dry Season Does Not Mean No Rain
One of the most important points for photographers planning a Uganda gorilla trek is that a dry season should not be interpreted as a completely rain-free season.
Mountain rainforest conditions can change quickly, and official Uganda Wildlife Authority information continues to describe Bwindi as a wet environment. The park’s documented annual precipitation varies substantially by location, reinforcing the importance of preparing for rain regardless of travel month.
Rainy Season Does Not Mean Constant Rain
The reverse is also true. A rainy season does not mean that a photographer will experience uninterrupted rainfall throughout the entire trek.
Weather can change within a day, creating periods of cloud, sunshine, mist, and rain. Photographers should therefore prepare for changing conditions rather than making decisions based solely on a seasonal label.
How Weather Affects Gorilla Photography Settings
Weather conditions can change the exposure settings required to produce sharp images. Darker conditions may require a wider aperture, higher ISO, or slower shutter speed, while brighter conditions may allow lower ISO settings and faster shutter speeds.
The correct combination depends on the camera and lens being used, the movement of the gorilla, the desired depth of field, and the available light.
Weather and Shutter Speed
Shutter speed becomes particularly important when photographing moving gorillas. Low light can tempt photographers to use slower shutter speeds, but a moving animal can introduce motion blur if the shutter speed becomes too slow.
Photographers should therefore balance shutter speed against ISO and aperture rather than treating ISO as something that must always remain as low as possible.
Weather and ISO
Higher ISO settings can become useful when forest conditions are dark. Modern cameras can often produce usable images at higher ISO values, but the exact performance varies between camera models.
There is no universal ISO setting for gorilla photography. The photographer should learn the practical limits of their own camera before the trip.
Weather and Aperture
A wider aperture can help in low light and can also separate a gorilla from the background. However, depth of field becomes shallower as aperture widens, which can make precise focusing more important.
Photographers should therefore choose aperture according to both light and composition rather than using one setting throughout the trek.
How the Time of Day Affects Gorilla Photography
The exact light available during a gorilla encounter is influenced by the forest canopy, cloud cover, terrain, and the position of the animals. Because the actual encounter time and location are not completely predictable, photographers should not expect a particular type of light simply because the trek begins at a certain time.
The most useful approach is to be prepared for rapid changes in exposure throughout the encounter.
Why the Forest Can Be Dark Even During the Day
Bwindi and Mgahinga are forest environments, meaning the sun does not illuminate every part of the ground equally. Dense vegetation can block substantial amounts of direct sunlight.
This is one reason gorilla photography can require different camera settings from open-country wildlife photography.
Best Time for Gorilla Photography: Dry Season vs Rainy Season
The dry season generally offers more manageable trail conditions and can be easier for photographers carrying equipment. The rainy season can offer richer atmospheric conditions but may increase mud, moisture, and equipment-management challenges.
Neither season guarantees superior photographs. The best choice depends on whether the photographer values trekking practicality and relatively predictable conditions or atmospheric rainforest imagery and the creative possibilities associated with rain and mist.
Photography Advantages of the Dry Season
Dry-season advantages include generally reduced rainfall, potentially easier trail conditions, and simpler camera handling. Photographers may also find it easier to move through the forest while protecting equipment.
These advantages are practical rather than photographic guarantees. A dry-season trek can still involve deep shade, difficult backgrounds, and challenging exposure conditions.
Photography Advantages of the Rainy Season
Rainy-season advantages are primarily creative. Wet foliage, mist, atmospheric backgrounds, and rain itself can contribute to distinctive rainforest imagery.
For photographers producing documentary or artistic portfolios, these conditions can add visual variety that may be difficult to obtain during consistently dry weather.
Photography Challenges of the Dry Season
Dry weather does not remove the technical challenges of gorilla photography. Forest shade, dark fur, dense vegetation, and unpredictable animal movement remain relevant.
Photographers should therefore avoid assuming that the dry season means simple photography.
Photography Challenges of the Rainy Season
The principal challenges include wet equipment, muddy trails, reduced light, mist, and potentially more difficult movement through the forest.
These conditions make waterproofing and careful equipment organization particularly important.
Should Photographers Avoid the Rainy Season?
Not necessarily. Photographers who strongly prefer predictable trekking conditions may favor drier periods, but photographers interested in atmospheric rainforest images may deliberately consider wetter periods.
The decision should be based on the intended photographic result and the photographer’s ability to work comfortably with changing weather.
How to Plan Around Uganda’s Gorilla Photography Seasons
Start by choosing the photographic style you want to develop. Portrait photographers may prioritize manageable conditions and soft light. Environmental photographers may value mist and wet vegetation. Documentary photographers may deliberately want a mixture of conditions.
Then choose the travel period, trekking sector, accommodation, and equipment accordingly. Current official information should always take precedence over fixed seasonal assumptions.
Weather Forecasts and Gorilla Photography
Weather forecasts can help photographers prepare but should not be treated as guarantees for conditions inside the forest. Mountain environments can experience localized weather changes that differ from conditions reported for nearby towns.
The practical approach is to prepare for both rain and dry conditions regardless of the forecast.
What Photographers Should Carry in Any Season
Regardless of travel month, photographers should prepare camera protection, spare batteries, adequate memory capacity, lens-cleaning materials, and practical carrying equipment. A lightweight rain layer or camera rain protection can be useful even during comparatively dry periods.
The goal is to avoid allowing an unexpected weather change to end the photographic session.
Best Time for Gorilla Photography: The Photographer’s Decision
The strongest answer is not simply “dry season” or “rainy season.” The best time for gorilla photography in Uganda is the period that best matches the photographer’s priorities and tolerance for changing conditions.
If the priority is easier trekking and simpler equipment management, a comparatively dry period can be attractive. If the priority is atmospheric rainforest imagery, wetter conditions may provide valuable creative opportunities.
Final Advice on Choosing the Best Time for Gorilla Photography
Photographers should think in terms of probabilities rather than guarantees. A drier month may reduce the likelihood of persistent rain but cannot guarantee clear skies. A wetter month may increase the chance of rain but cannot guarantee that the entire trek will be wet.
The most important preparation is therefore flexibility. Protect the equipment, understand the camera settings, prepare for low light, carry appropriate clothing, and be ready to photograph changing conditions.
Uganda Wildlife Authority confirms that Bwindi and Mgahinga can be visited for gorilla trekking within their established management framework, while its official climate information demonstrates that both parks experience significant seasonal variation.
For a photographer, that seasonal variation is not simply a logistical issue. It is part of the visual character of gorilla photography in Uganda. Rain, cloud, sunlight, mist, wet vegetation, and deep forest shade can all become elements of the final photographic story.
Information not found in current search results: evidence that a particular month consistently produces better gorilla poses, closer encounters, specific behaviors, superior portrait opportunities, or guaranteed photographic conditions. Such claims should not be presented as established facts because gorilla movements and local weather conditions vary naturally.
Gorilla Photography Rules, Ethics and Responsible Wildlife Photography

Visitors practice responsible wildlife viewing with wild gorillas in the forest.
Gorilla photography in Uganda is not simply a matter of carrying a camera into the forest and looking for memorable photographs. A successful photography experience must respect the welfare of the mountain gorillas, the instructions of Uganda Wildlife Authority (UWA) staff, the conditions of the protected area, and the rules governing gorilla tracking. For photographers, understanding these requirements is essential because the best photograph is never more important than the wellbeing of the animals.
Gorilla trekking in Uganda takes place in Bwindi Impenetrable National Park and Mgahinga Gorilla National Park. UWA identifies these as Uganda’s mountain-gorilla destinations and states that normal gorilla tracking provides a maximum of one hour of viewing with the gorillas.
Photography should therefore be treated as part of a regulated wildlife encounter rather than an independent activity. The photographer does not control the position of the gorillas, the distance between the group and visitors, the route through the forest, or how long the animals remain visible. These factors are determined by the animals, the guides, the rangers, and the applicable conservation rules.
Why Responsible Gorilla Photography Matters
Mountain gorillas are highly protected wildlife, and tourism operates within a conservation framework designed to reduce disturbance and protect both gorillas and visitors. UWA’s mandate includes sustainable management of wildlife and protected areas, while its gorilla guidelines establish procedures for tracking and viewing gorillas.
For photographers, responsible behavior has a direct connection with photographic quality. Remaining calm, following the guide, avoiding unnecessary movement, and allowing the animals to behave naturally can create better opportunities for authentic photographs than trying to force a particular composition.
Follow the Gorilla Guide and Ranger Instructions
The guide and ranger team should always take priority over the photographer’s preferred composition. If a ranger asks visitors to stop, move, change position, lower equipment, or maintain a particular distance, the instruction should be followed immediately.
This is particularly important because the people leading the trek are responsible for interpreting the behavior of the gorilla group and managing the encounter. A photographer may be concentrating on exposure or composition and fail to notice a behavioral change that is obvious to an experienced ranger.
Do Not Approach Gorillas for a Better Photograph
Photographers should never move toward a gorilla simply to obtain a closer image. The objective is to photograph the animal under the conditions provided by the authorized tracking experience.
A longer lens can often be more useful than attempting to physically reduce the distance. More importantly, maintaining the required distance helps minimize disturbance and supports the conservation principles governing gorilla tourism.
Do Not Ask Guides to Move the Gorillas
Gorillas should never be treated as staged photographic subjects. Photographers should not ask guides or rangers to influence the animals’ movements simply to obtain a clearer photograph.
Natural behavior is one of the most valuable elements of wildlife photography. A photograph of a gorilla behaving naturally is more meaningful as a wildlife image than a photograph obtained by interfering with the animal’s behavior.
Never Block the Gorillas’ Movement
A photographer should remain aware of the animal’s path. If a gorilla begins moving toward or around visitors, the photographer should follow the instructions of the ranger rather than attempting to maintain a particular composition.
Equipment should never be positioned in a way that obstructs the gorilla’s movement. Wildlife photography requires the photographer to adapt to the animal rather than forcing the animal to adapt to the photographer.
Respect the Official Gorilla Viewing Time
UWA’s current gorilla and chimpanzee management guidelines state that normal gorilla tracking runs from 8:00 a.m. until visitors return to the briefing location for debriefing, while the maximum viewing time for normal gorilla tracking is one hour. Gorilla Habituation Experience has a different schedule and a maximum viewing period of four hours.
Photographers should therefore plan their expectations around the official activity rather than assuming that they can remain with a gorilla family indefinitely because photographic conditions are good.
Photography During the One-Hour Gorilla Encounter
The one-hour viewing period can pass quickly, especially when the photographer is attempting to manage exposure, focus, composition, and lens changes simultaneously.
Preparation before reaching the gorillas is therefore extremely important. Camera batteries should be ready, memory capacity should be sufficient, and the photographer should already understand the basic settings required for low-light forest conditions.
Do Not Waste the Encounter Changing Equipment Constantly
Changing lenses repeatedly can cause the photographer to miss spontaneous behavior. It can also make it harder to remain attentive to the guide’s instructions and the movement of the gorilla family.
A practical camera setup that covers the anticipated focal range can therefore be more useful than carrying excessive equipment.
Keep Camera Movements Controlled
Rapid movements can be distracting during a close wildlife encounter. Photographers should make deliberate camera adjustments and avoid unnecessary gestures.
This does not mean that every movement is prohibited. It means that photographers should remain composed and responsive to the instructions of the ranger team while operating their equipment.
Use the Camera Without Disturbing the Gorillas
The camera should remain a passive observation tool. Photographers should avoid behaviors designed to attract a gorilla’s attention for the purpose of creating a photograph.
Do not call to the gorilla, make noises to obtain eye contact, wave equipment, or otherwise attempt to manipulate the animal’s behavior. The strongest wildlife images often come from patience and observation rather than intervention.
Respect Gorilla Behavior
Gorillas may feed, rest, walk, climb, groom, interact with other members of their family, or simply remain still. Photographers should document these behaviors as they naturally occur.
There is no requirement for every photograph to show the gorilla looking directly into the camera. Images showing natural behavior can provide more meaningful information about the animal’s life and social environment.
Do Not Chase a Gorilla for Eye Contact
Eye contact can produce a compelling wildlife photograph, but photographers should never pursue an animal around the forest simply to obtain it.
If a gorilla looks toward the visitors naturally, the photographer can respond by focusing and composing the image. If the gorilla looks away, that is also part of the animal’s natural behavior and can produce a different type of photograph.
Responsible Photography Means Accepting Imperfect Images
Not every photograph will be sharp, perfectly exposed, or unobstructed. Dense vegetation, low light, movement, and changing weather are natural parts of gorilla photography.
Photographers should accept that some moments will be visually imperfect. A partially obscured gorilla can still be an authentic record of a rainforest encounter, while a technically perfect photograph is not worth disturbing the animal.
Do Not Remove Vegetation for a Clearer Composition
Forest vegetation should not be cut, pulled, broken, or moved simply to create a clearer photographic view. The vegetation forms part of the gorillas’ natural habitat and should remain undisturbed.
Instead, photographers should work with the environment. Changing position when permitted, adjusting focal length, waiting for the animal to move, or using the vegetation creatively can all produce stronger images without altering the habitat.
Do Not Touch the Gorillas
Gorilla photography does not involve physical interaction with the animals. Visitors should never attempt to touch a gorilla, even if the animal approaches unexpectedly.
The appropriate response is to remain calm and follow the instructions of the ranger. The objective is observation and photography under controlled conditions, not physical interaction.
Why Distance Matters in Gorilla Photography
Distance is an important part of responsible gorilla tourism because it reduces unnecessary physical proximity between humans and gorillas. UWA has emphasized distance guidelines as part of measures designed to protect primates from human diseases.
Photographers should therefore select equipment that allows useful photographs without attempting to move closer to the animals.
Use Longer Focal Lengths Instead of Moving Closer
A telephoto lens can allow a photographer to fill more of the frame while remaining at an appropriate distance. This is one of the most useful principles of responsible gorilla photography.
The ideal lens depends on the camera system and the circumstances, but photographers should select equipment based on the permitted viewing distance rather than planning to approach the gorillas for closer photographs.
Do Not Use Flash Without Explicit Authorization
Photographers should not assume that flash photography is appropriate simply because their camera permits it. In a wildlife encounter, the photographer should follow the current instructions of UWA staff and the ranger team regarding camera equipment and lighting.
Natural light is generally the foundation of gorilla photography because it preserves the natural appearance of the forest environment and avoids introducing unnecessary equipment into the encounter.
Natural Light and Gorilla Photography
Natural forest light can be difficult but rewarding. Dense vegetation produces shade, while occasional openings in the canopy can create brighter areas.
Rather than attempting to control the lighting, photographers should learn to work with it. Exposure compensation, appropriate metering, shutter speed, aperture, and ISO can help manage the changing conditions.
Do Not Use Photography to Provoke Behavior
Wildlife photography should never involve provoking an animal into displaying a particular behavior. Photographers should not make sounds, throw objects, gesture aggressively, or otherwise attempt to make a gorilla look toward the camera.
The photographic value comes from documenting genuine behavior rather than creating a staged moment.
Respect Other Visitors
Gorilla trekking is a shared experience. A photographer should avoid occupying the best available position for an extended period if doing so prevents other visitors from viewing the gorillas.
Photography should be balanced with the experience of the entire trekking group. When the ranger changes the group’s position, photographers should adapt rather than attempting to remain in one preferred location.
Do Not Let the Camera Separate You From the Group
Photographers can become absorbed in their viewfinder and lose awareness of their surroundings. This can create problems in a dense forest environment.
Remain aware of the group, the guide, the ranger, and the surrounding terrain. Photography should remain integrated into the trekking experience rather than becoming an isolated activity.
Follow Designated Gorilla Tracking Procedures
UWA’s current guidelines state that gorilla tracking is conducted through designated entry points and under authorized arrangements. The guidelines also state that tracking outside designated entry points or without authorized guides and authentic permits can result in enforcement action.
Photographers should therefore ensure that their photography trip is part of an officially authorized gorilla trekking or habituation experience.
Gorilla Photography and Conservation
Responsible photography can contribute indirectly to conservation by helping visitors understand the importance of mountain gorillas and their habitat. UWA states that gorilla tourism contributes to conservation and that revenue-sharing mechanisms support communities surrounding protected areas.
This makes ethical photography part of a broader conservation story. The photographer is not simply collecting images but participating in a regulated tourism system connected to protected-area management and local communities.
Photography Should Support Conservation, Not Exploitation
A strong gorilla photograph should communicate respect for the animal and its environment. Images should not be presented in ways that encourage viewers to believe that mountain gorillas are tame pets or that close physical interaction is normal.
Captions and accompanying articles should accurately explain that the photographs were taken during a regulated wildlife encounter.
Be Accurate When Publishing Gorilla Photographs
Photographers should avoid attaching unsupported claims to their images. If the identity of a gorilla, family, location, age, sex, or behavior has not been confirmed by the appropriate guide or authority, it should not be presented as certain.
This is particularly important for professional photographers, travel publishers, conservation websites, and tourism businesses because inaccurate captions can spread misinformation about gorilla behavior and conservation.
Do Not Misrepresent Wild Gorillas as Domestic Animals
Mountain gorillas photographed during trekking remain wild animals. Even when habituated to the presence of authorized human observers, they should not be portrayed as domesticated.
Responsible visual storytelling should preserve this distinction and communicate the importance of maintaining respectful boundaries.
Photography Ethics and Gorilla Conservation
The central principle of ethical gorilla photography is simple: the photographer adapts to the gorilla rather than expecting the gorilla to adapt to the photographer.
This means accepting imperfect angles, waiting for natural behavior, following ranger instructions, respecting viewing limits, avoiding unnecessary movement, protecting the habitat, and prioritizing animal welfare over the pursuit of a particular photograph.
What to Do if a Gorilla Approaches
A close approach by a gorilla is not an invitation to touch, follow, or attempt to create a dramatic photograph. The appropriate response is to remain calm and follow the ranger’s instructions.
The ranger team is responsible for managing the encounter and will guide visitors on how to respond to unexpected animal movement.
What to Do if a Gorilla Moves Behind Vegetation
Do not attempt to clear the vegetation or move toward the animal without authorization. Instead, wait and observe.
Gorillas move through complex forest environments, and an obstructed view is a normal part of wildlife photography. Sometimes the animal will naturally move into a clearer position; sometimes it will not.
What to Do When Lighting Becomes Difficult
When a gorilla moves into darker vegetation, photographers should adjust their camera settings rather than moving closer to obtain more light.
Increasing ISO, opening the aperture where appropriate, or adjusting shutter speed can help maintain exposure while preserving the required distance.
What to Do When the Gorilla Moves Quickly
Fast movement is a reason to prioritize autofocus and shutter speed rather than attempting to physically reposition yourself.
Photographers should anticipate movement where possible and maintain awareness of the animal’s direction. However, they should always remain within the position and boundaries established by the ranger.
Ethical Gorilla Photography for Professional Photographers
Professional photographers have an additional responsibility because their images may be viewed by large audiences. Photographs should be accompanied by accurate captions and should not encourage inappropriate behavior among viewers.
Professional work should also respect the applicable licensing, publication, conservation, and protected-area requirements.
Ethical Gorilla Photography for Beginners
Beginners should focus on observing first and photographing second. The temptation to photograph every second of the encounter can result in missed opportunities to understand what the gorilla family is doing.
Taking time to observe can also make photography easier because the photographer begins to anticipate movement rather than reacting to every moment.
How to Balance Photography and Observation
A useful approach is to alternate between photographing and simply watching. After capturing a sequence, lower the camera and observe the gorillas without looking through the viewfinder.
This can improve situational awareness and help the photographer understand what is likely to happen next.
Responsible Gorilla Photography Checklist
Before entering the forest, photographers should understand the current UWA rules, have valid authorization for the activity, listen carefully to the briefing, prepare their equipment before the encounter, and remain ready to follow ranger instructions.
During the encounter, photographers should maintain the required distance, avoid touching or provoking gorillas, avoid disturbing vegetation, respect the viewing limit, and remain considerate of other visitors.
After the encounter, photographs should be captioned accurately and presented in a way that promotes responsible understanding of mountain gorilla conservation.
The Golden Rule of Gorilla Photography
The most important rule for gorilla photographers is to prioritize the gorillas over the photograph.
If obtaining an image requires disturbing an animal, ignoring a ranger instruction, moving closer than permitted, obstructing another visitor, altering vegetation, or extending the encounter beyond the authorized viewing period, the photograph is not worth pursuing.
Final Principles for Responsible Gorilla Photography
Gorilla photography is most rewarding when it combines technical skill with patience, respect, and conservation awareness. Uganda’s official gorilla guidelines establish a regulated framework for tracking and viewing, while UWA’s conservation mandate places wildlife protection at the center of protected-area management.
Photographers should prepare their cameras before the encounter, use equipment appropriate for the permitted viewing distance, work with natural conditions, avoid manipulating animal behavior, follow the ranger team, respect the official viewing period, and accept that wildlife photography cannot be completely controlled.
The result is not only a stronger photographic experience but also a more responsible representation of Uganda’s mountain gorillas. The most valuable gorilla photograph is one that records a genuine moment without compromising the welfare of the animal, the integrity of the habitat, or the conservation principles that make gorilla tourism possible.
Information not found in current search results: an official UWA rule specifying a universal camera model, lens focal length, shutter speed, ISO setting, or photographic technique that every gorilla photographer must use. These are equipment and creative decisions that depend on the photographer’s camera system and the conditions encountered in the forest.
Best Camera Gear and Equipment for Gorilla Photography
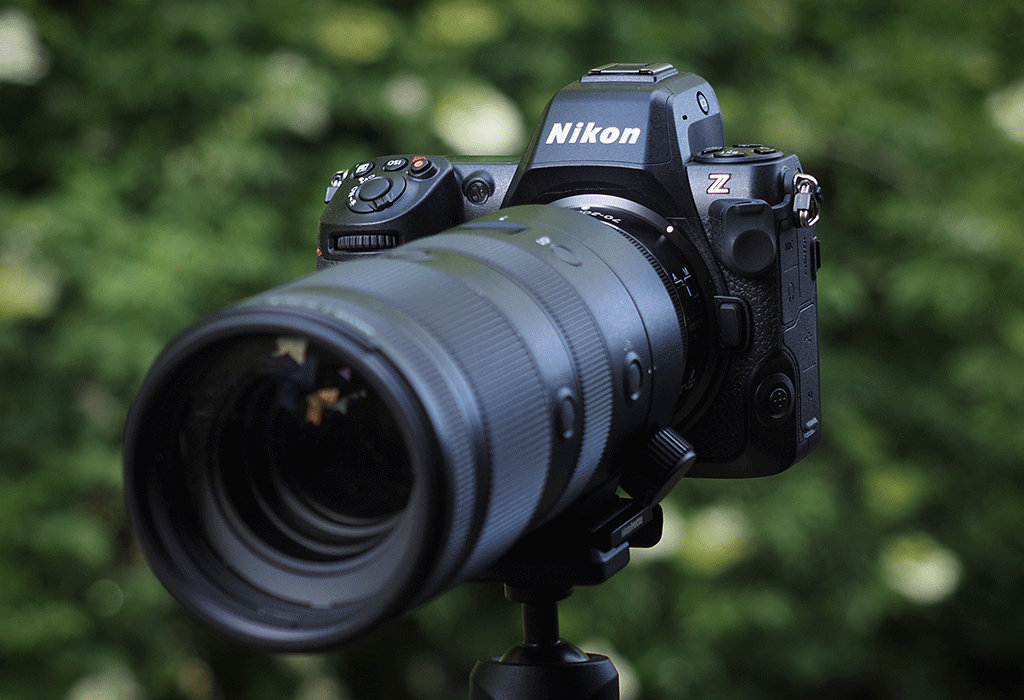 Gorilla photography in Uganda requires a carefully considered camera setup because photographers work in dense rainforest, variable natural light, uneven terrain, changing weather, and a strictly limited wildlife-viewing period. The ideal gorilla photography gear is therefore not necessarily the largest or most expensive collection of cameras and lenses. It is a practical setup that allows the photographer to respond quickly while protecting equipment from moisture and remaining comfortable during the trek.
The Uganda gorilla photography guide can be used as part of the preparation process, particularly when planning a photography-focused gorilla trekking itinerary.
What Camera Is Best for Gorilla Photography?
There is no single camera model that is officially designated as the best camera for gorilla photography. Both modern mirrorless and DSLR cameras can produce high-quality wildlife photographs when used correctly.
The more important characteristics are reliable autofocus, good performance in low light, suitable ISO performance, adequate battery capacity, responsive controls, and compatibility with an appropriate lens. A photographer who understands their camera thoroughly will generally be better prepared than someone carrying an advanced camera they have not practiced with.
Mirrorless Cameras for Gorilla Photography
Mirrorless cameras can be particularly practical for wildlife photography because many modern models provide strong autofocus systems, electronic viewfinders, image stabilization, and relatively compact bodies.
The choice should be based on the photographer’s existing system rather than buying a new camera solely for a gorilla trek. Familiarity with controls is especially valuable because the photographic encounter is time-limited.
DSLR Cameras for Gorilla Photography
DSLR cameras remain capable wildlife-photography tools. A photographer who already owns a reliable DSLR does not necessarily need to replace it before traveling to Uganda.
A familiar DSLR paired with a suitable lens can produce excellent results in the forest. The photographer should concentrate on mastering exposure, autofocus, shutter speed, and lens selection rather than assuming that a newer camera automatically produces better photographs.
Full-Frame vs Crop-Sensor Cameras
Both full-frame and crop-sensor cameras can be used for gorilla photography. Full-frame systems can provide advantages in low-light performance depending on the particular camera, while crop-sensor systems can provide additional effective reach with compatible lenses.
There is no universal sensor format that guarantees better gorilla photographs. The photographer should consider the complete camera-and-lens combination, including weight, low-light performance, autofocus, and portability.
Why Low-Light Performance Matters
Bwindi’s dense forest canopy can create challenging lighting conditions. A recent photography guide focused specifically on gorilla trekking in Bwindi identifies low forest light as one of the principal technical challenges for photographers.
This means photographers should be comfortable working at higher ISO settings when necessary. It is usually better to capture a properly focused photograph with some digital noise than to use a shutter speed so slow that subject movement produces significant blur.
Choosing a Lens for Gorilla Photography
Lens selection is one of the most important equipment decisions for a gorilla photographer. Unlike open savannah wildlife photography, gorilla encounters take place in dense forest where the subject may be relatively close at one moment and partially obscured farther away at another.
A versatile zoom can therefore be particularly useful because it allows the photographer to adjust composition without physically moving toward the animal.
70-200mm Lens for Gorilla Photography
A 70-200mm lens is a strong option for photographers who already own one. A wide maximum aperture such as f/2.8 can be particularly useful in low-light forest conditions, while the zoom range provides flexibility for portraits and environmental compositions.
However, photographers should not interpret 70-200mm as a mandatory specification. Other lenses can also be effective depending on the camera system, encounter distance, and intended composition.
24-105mm Lens for Gorilla Photography
A 24-105mm or similar standard zoom can be useful when photographers want flexibility between environmental photographs and closer portraits.
The wider end can include vegetation and forest context, while the longer end can provide tighter framing when the animals are sufficiently close. The trade-off is that many standard zooms have smaller maximum apertures than professional telephoto lenses.
Telephoto Lenses for Gorilla Photography
Telephoto lenses can help photographers fill the frame without attempting to reduce the permitted distance between themselves and the gorillas.
They can be especially useful when a gorilla is farther away or surrounded by vegetation. However, a very long lens can become less practical if the animal moves close to the group, which is why versatility can be more valuable than extreme focal length.
Wide-Angle Lenses for Gorilla Photography
Wide-angle lenses can be useful for environmental photography when the objective is to show a gorilla within its rainforest habitat.
They are particularly valuable for storytelling images that include vegetation, forest structure, trails, or the surrounding landscape. However, photographers should only use them from the permitted position and should never move closer simply because a wide lens does not fill the frame.
Prime Lenses vs Zoom Lenses
Prime lenses can offer wide apertures and excellent optical performance, but zoom lenses provide greater compositional flexibility when the photographer cannot freely change position.
For a time-limited gorilla encounter, versatility can be especially useful. A photographer who can change focal length quickly may spend less time changing lenses and more time observing and photographing the animals.
Do You Need Two Cameras?
Two camera bodies can provide redundancy and reduce the need to change lenses, but carrying two bodies also increases weight and complexity.
For most photographers, the decision should depend on the equipment they already own, their experience carrying multiple bodies, and the scale of the photographic project. A single reliable camera can be entirely appropriate for a carefully planned gorilla trek.
Why a Second Camera Can Be Useful
A second camera can provide backup if the primary camera develops a problem. It can also allow two lenses to remain ready simultaneously.
Professional photographers working on important assignments may value this redundancy, but casual photographers should not feel that two cameras are required to obtain good images.
Camera Battery Planning
Battery management is particularly important because photographers may spend several hours trekking before reaching the gorillas. The camera may also be used during the approach for landscapes, vegetation, birds, or other subjects.
Carry fully charged batteries and avoid assuming that a single battery will be sufficient for a full photography day.
Spare Batteries for Gorilla Photography
The number of spare batteries required depends on the camera, temperature, shooting frequency, stabilization features, screen usage, and whether video is recorded.
Photographers should test their normal battery consumption before the trip rather than relying on a generic number. Spare batteries should be protected from moisture and carried securely.
Memory Cards for Gorilla Photography
Memory capacity matters because wildlife photography can generate large numbers of files, particularly when photographers use burst shooting.
High-capacity cards can be useful, but reliability should take priority over simply selecting the largest available card. Photographers should use cards compatible with their camera and test them before the trip.
Bring a Backup Memory Card
A spare memory card provides an additional layer of protection against card failure or accidental loss. It also prevents the photographer from being forced to stop shooting because the primary card becomes full.
Memory cards should be stored in a secure, protected case when not inside the camera.
Camera Rain Protection
Rain protection is one of the most important accessories for gorilla photography in Uganda. Bwindi is a rainforest environment, and changing weather should be expected even when traveling during a comparatively drier period.
A camera rain cover or waterproof protective sleeve can help protect the camera and lens during unexpected rainfall.
Protecting the Camera From Humidity
Humidity can create additional challenges for photographic equipment. Moving between different environments can sometimes cause condensation on lenses and other equipment surfaces.
Photographers should avoid repeatedly exposing sensitive equipment to unnecessary moisture and should keep unused equipment protected inside an appropriate bag.
Lens Cloths and Cleaning Materials
Rain, humidity, vegetation, and fingerprints can affect the front element of a lens. A clean microfiber cloth and suitable lens-cleaning materials are therefore useful additions to a gorilla photography kit.
Cleaning should be performed carefully to avoid scratching optical surfaces.
Camera Bag for Gorilla Trekking
A camera bag for gorilla trekking needs to protect equipment without becoming excessively heavy. A comfortable backpack or secure camera-carrying system can be preferable to a bulky case that becomes difficult to manage on forest trails.
The bag should also provide reasonable protection against rain and accidental contact with vegetation.
Waterproof Camera Bag Protection
Even a weather-resistant camera bag should be paired with additional rain protection when conditions become wet. Waterproof covers can provide an extra layer of protection during heavier rainfall.
Photographers should be able to access the camera quickly while still keeping unused equipment protected.
Camera Strap for Gorilla Photography
A secure camera strap can make a significant difference when moving through uneven forest terrain. The camera should remain attached securely to the photographer rather than being carried loosely by hand throughout the trek.
A strap should also allow the photographer to bring the camera into shooting position quickly when a photographic opportunity appears.
Monopod or Tripod for Gorilla Photography?
A full tripod is often inconvenient in dense forest terrain because space can be limited and the photographer may need to move with the group. A lightweight monopod can be more practical for photographers using heavier lenses, although it is not essential for every visitor.
Photographers should always follow the instructions of the guide and ranger when positioning equipment.
Image Stabilization for Gorilla Photography
Image stabilization can be helpful in low-light conditions by reducing camera shake. However, stabilization does not stop subject movement.
If a gorilla moves during the exposure, a slow shutter speed can still produce motion blur even when the camera itself is stabilized. Photographers should therefore understand the difference between camera shake and subject movement.
Autofocus for Gorilla Photography
Reliable autofocus can be extremely useful when photographing moving gorillas in dense vegetation. Modern cameras often provide different autofocus-area and subject-detection options.
Photographers should test these features before the trip. The best autofocus configuration depends on the camera model, lens, vegetation, subject movement, and photographer preference.
Eye Autofocus and Gorilla Photography
Some modern cameras provide animal or eye-detection autofocus. When available and reliable with the photographer’s camera system, these features can assist with focusing on the gorilla’s face or eye.
However, photographers should not depend entirely on automated subject detection. Dense foliage can confuse autofocus systems, so manual focus techniques and conventional autofocus modes can still be useful.
Shutter Speed for Gorilla Photography
Shutter speed needs to be fast enough to minimize movement blur when the gorilla is moving. A recent photography guide recommends preparing for relatively fast shutter speeds because subject movement remains a challenge in low forest light.
There is no universal shutter speed that works in every situation. A stationary gorilla and a rapidly moving juvenile require different settings.
Aperture for Gorilla Photography
A wider aperture can help provide more light in the forest and can also separate the gorilla from distracting vegetation.
However, very wide apertures reduce depth of field. When photographing a gorilla’s face at close range, this can mean that one eye is sharp while another area of the face falls outside the sharp focus zone.
ISO for Gorilla Photography
ISO is an important tool for managing the low-light conditions of the forest. Rather than trying to keep ISO as low as possible at all times, photographers should prioritize obtaining a sharp, correctly exposed image.
The appropriate ISO depends on the camera’s capabilities, the lens aperture, shutter speed, and available light.
Do You Need a Flash?
Photographers should not plan their gorilla photography around flash. The current photography guidance for Bwindi specifically identifies flash photography as prohibited, making it important to prepare a natural-light setup before entering the forest.
Turn off automatic flash functions before entering the forest so that the camera does not unexpectedly activate a flash during the encounter.
Why Natural Light Is Important
Natural light preserves the appearance of the forest and avoids introducing artificial illumination into the wildlife encounter.
Photographers should learn to work with available light through exposure settings, positioning where permitted, and careful composition rather than relying on artificial lighting.
Camera Settings Should Be Prepared Before the Encounter
One of the most important equipment principles is preparation. The photographer should already understand the camera’s controls before reaching the gorilla family.
Changing basic settings while standing in front of the gorillas can consume valuable observation time. The camera should be ready for the low-light forest before the encounter begins.
Do Not Carry More Equipment Than You Can Manage
Every additional lens, body, accessory, and support device adds weight. Gorilla trekking can involve substantial walking through uneven terrain, so equipment should be selected carefully.
A smaller kit that the photographer can carry comfortably may produce better results than an oversized kit that causes fatigue.
Minimal Gorilla Photography Kit
A practical minimal setup can consist of one reliable camera body, one versatile lens, spare batteries, spare memory cards, rain protection, a cleaning cloth, and a secure carrying system.
This approach keeps the photographer mobile while providing the essential tools needed to respond to changing conditions.
Advanced Gorilla Photography Kit
More experienced photographers may choose two camera bodies, multiple lenses, additional batteries, higher-capacity memory cards, a monopod, and more extensive weather protection.
The advantage is greater redundancy and flexibility. The disadvantage is increased weight and complexity. The correct balance depends on the photographer and the purpose of the trip.
Camera Equipment for Professional Gorilla Photographers
Professional photographers should consider redundancy particularly carefully. A second body, backup storage, multiple batteries, and weather protection can reduce the consequences of equipment failure.
Professional equipment should also be tested extensively before departure rather than being used for the first time during the gorilla encounter.
Camera Equipment for First-Time Gorilla Photographers
First-time photographers should resist the temptation to purchase an entirely new system immediately before the trip. Familiar equipment is easier to operate under pressure.
Practice with the existing camera in low-light conditions, photograph moving subjects, test autofocus, and become comfortable changing ISO, aperture, and shutter speed quickly.
Practice Before Gorilla Trekking
Technical preparation can make a greater difference than expensive equipment. Photographers should practice photographing animals in low light, moving subjects, and situations where the background contains branches and foliage.
The objective is to make basic camera adjustments automatic before entering Bwindi or Mgahinga.
Do You Need Professional Camera Gear?
No. Professional equipment can provide advantages, particularly in low light, autofocus performance, and lens quality, but excellent photographs can also be produced with less expensive equipment when the photographer understands how to use it.
The quality of the photograph depends on more than the equipment. Timing, composition, focus, light, animal behavior, and ethical positioning are equally important.
How to Choose Gorilla Photography Gear
Start with the camera you already know. Then choose the most versatile lens that fits the expected conditions and your photographic style. Add spare batteries, memory cards, weather protection, and a comfortable carrying solution.
Only add specialist equipment when it solves a specific problem that you expect to encounter.
Best Gorilla Photography Equipment Strategy
The strongest equipment strategy is to maximize reliability and versatility while minimizing unnecessary weight. A photographer should be able to move comfortably, react quickly, protect the equipment from rain, and operate the camera without constantly looking through menus.
Recent gorilla photography guidance similarly emphasizes preparing camera settings before reaching the gorillas, choosing a versatile lens, protecting equipment from rain, and managing the limited encounter time carefully.
Final Gorilla Photography Gear Checklist
A well-prepared gorilla photographer should arrive with a reliable camera, an appropriate lens, fully charged batteries, spare batteries, sufficient memory capacity, rain protection, lens-cleaning materials, and a secure camera-carrying system.
Photographers using heavier equipment may also consider a lightweight monopod, while photographers carrying minimal equipment may find that handheld shooting is more practical.
Equipment Is Only Half of Gorilla Photography
The best camera gear cannot compensate for poor preparation. Gorilla photography takes place in a demanding environment where light can change quickly, animals move unpredictably, vegetation can obstruct the subject, and the encounter itself is time-limited.
The photographer should therefore regard equipment as a tool rather than the objective. Understanding the camera, anticipating the conditions, respecting the gorillas, and responding quickly to natural opportunities are more important than owning the most expensive equipment.
Final Advice on Gorilla Photography Equipment
Choose equipment that you can operate confidently, carry comfortably, and protect effectively. Prioritize a versatile lens, dependable camera body, sufficient battery and memory capacity, low-light capability, and rain protection. Prepare the camera before reaching the gorillas and avoid carrying equipment simply because it is available.
For most photographers, a carefully selected and familiar setup will be more useful than an oversized professional kit. The objective is to arrive at the gorilla encounter ready to photograph rather than spending the limited viewing period organizing equipment.
Information not found in current search results: evidence that one specific camera brand, camera model, lens brand, focal length, ISO value, or aperture setting is universally the best choice for every gorilla photographer. These choices depend on the camera system, lighting conditions, encounter distance, subject movement, and photographic objectives.
Best Camera Settings for Gorilla Photography
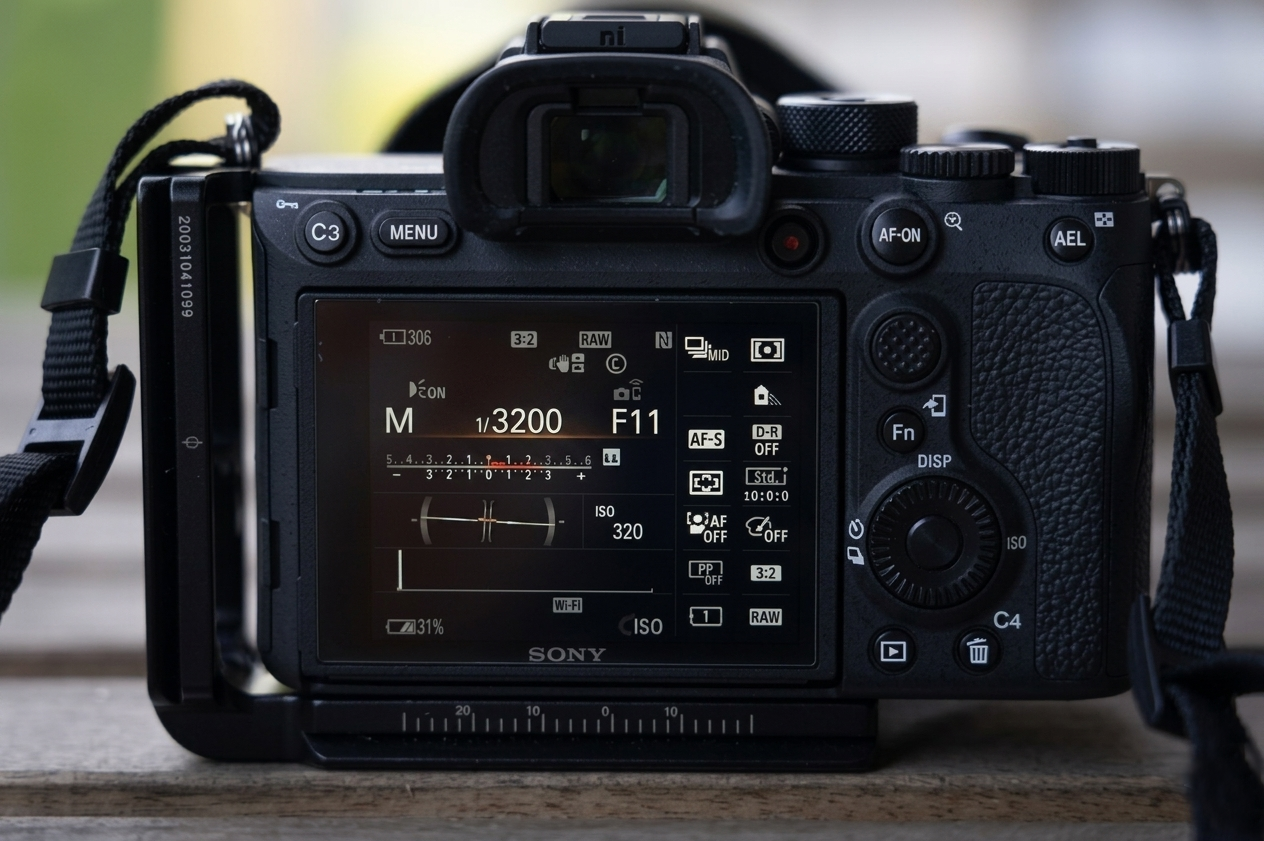
Optimal high-speed settings for sharp wildlife photography.
Getting the right camera settings is one of the most important parts of successful gorilla photography. The rainforest environment around Bwindi and Mgahinga can produce difficult photographic conditions, with deep shade, patches of brighter natural light, dense vegetation, movement, and sudden changes in weather. A photographer who prepares the camera before reaching the gorillas can spend more of the limited viewing period observing, composing, and capturing meaningful images instead of navigating menus.
For photographers planning mountain gorilla photography, there is no single camera setting that works perfectly for every encounter. The correct combination of aperture, shutter speed, ISO, autofocus, metering, and exposure compensation changes according to the available light, the movement of the gorilla, the lens being used, and the desired appearance of the photograph.
Why Gorilla Photography Settings Are Different
Gorilla photography is fundamentally different from photographing wildlife in an open savannah. In an open environment, light may be relatively abundant and predictable, while a rainforest can place a gorilla in deep shade one moment and a patch of brighter light the next.
The forest also introduces branches, leaves, vines, and other visual obstacles between the camera and the subject. Autofocus therefore has to cope with a complicated background while the photographer simultaneously manages exposure and subject movement.
Recent photography guidance specifically identifies Bwindi’s low forest light as a major technical challenge and recommends preparing camera settings before reaching the gorilla group.
Prepare the Camera Before Reaching the Gorillas
One of the biggest mistakes a photographer can make is waiting until the gorilla encounter begins before deciding how the camera should be configured.
Use the approach through the forest as preparation time. Check the battery, memory card, autofocus mode, exposure mode, ISO, aperture, shutter speed, image stabilization, and flash settings before reaching the gorilla family.
The objective is simple: when the gorillas are located, the camera should already be capable of producing usable photographs.
Best Shooting Mode for Gorilla Photography
Aperture Priority can be a practical option for photographers who want to control depth of field and the amount of light entering the lens while allowing the camera to select an appropriate shutter speed.
Manual exposure can provide greater consistency when the lighting is relatively stable, particularly when the photographer has enough experience to adjust settings quickly.
There is no universal requirement to use one exposure mode. The best choice is the mode the photographer understands and can operate confidently under changing forest conditions.
Aperture Settings for Gorilla Photography
Aperture has two major effects in gorilla photography: it controls the amount of light reaching the sensor and influences depth of field.
A wider aperture allows more light to enter the camera, which can be valuable in dark forest conditions. It can also help separate the gorilla from distracting vegetation.
However, an extremely wide aperture produces a shallow depth of field. At close distances, this can make precise focusing particularly important because the gorilla’s eye may be sharp while another part of the face becomes noticeably softer.
When to Use a Wide Aperture
A wide aperture can be useful when the forest is dark and the photographer needs to maintain a workable shutter speed.
It can also be useful for individual portraits where the photographer wants the gorilla to stand out from leaves and branches.
The photographer should nevertheless monitor the depth of field and ensure that the most important part of the subject, particularly the eye in a portrait, remains within the sharp focus area.
When to Stop Down the Aperture
A slightly narrower aperture can provide greater depth of field when the lighting permits it.
This can be useful when photographing more than one gorilla, environmental scenes, or situations where the photographer wants more of the animal and surrounding vegetation to remain recognizable.
The trade-off is reduced light reaching the sensor, which may require a higher ISO or slower shutter speed.
Shutter Speed for Gorilla Photography
Shutter speed is particularly important because gorillas do not remain perfectly still. Even a seated gorilla can move its head, hands, shoulders, or body unexpectedly.
A shutter speed that is too slow can therefore create motion blur even when the photographer is holding the camera steadily.
Recent specialist guidance for Bwindi recommends preparing for relatively fast shutter speeds because subject movement remains a significant challenge in low forest light.
Why 1/200 Second Is a Useful Starting Point
A shutter speed around 1/200 second can be a useful starting point for moving gorillas, but it should not be treated as a universal rule.
A stationary gorilla may allow a slower shutter speed, while a moving juvenile may require a faster one. The photographer should judge the subject’s movement and available light rather than blindly applying one number to every photograph.
When to Increase Shutter Speed
Increase shutter speed when the gorilla is walking, climbing, interacting with another gorilla, turning quickly, or displaying other active behavior.
Increasing shutter speed reduces the time available for movement during the exposure, helping preserve detail in the subject.
The disadvantage is that a faster shutter speed allows less light to reach the sensor, meaning ISO may need to increase or the aperture may need to open wider.
When a Slower Shutter Speed Can Work
A slower shutter speed can work when the gorilla is completely or relatively still and the photographer has adequate camera stability.
However, image stabilization only reduces camera movement. It does not freeze the movement of the gorilla itself.
This distinction is particularly important when photographing animals in low light.
ISO Settings for Gorilla Photography
ISO is one of the most useful controls for dealing with the darker conditions found beneath the forest canopy.
Photographers should not be afraid of increasing ISO when necessary. A sharp photograph with some digital noise is generally more useful than a technically clean photograph that contains significant motion blur.
The appropriate ISO depends on the camera’s sensor, lens aperture, shutter speed, available light, and the photographer’s tolerance for noise.
Should You Use ISO 1600 to 3200?
ISO 1600 to 3200 can be a useful working range in dark forest conditions, and recent specialist guidance recommends preparing for this range before entering the forest.
However, this should be considered a starting range rather than a mandatory setting. Some scenes may require ISO 800, while very dark conditions may require ISO 6400 or higher depending on the camera and lens.
Modern cameras differ significantly in their high-ISO performance, so photographers should test their own equipment before traveling.
Auto ISO for Gorilla Photography
Auto ISO can be useful when the light changes rapidly. It allows the photographer to maintain control over shutter speed and aperture while allowing the camera to compensate for changing illumination.
This can be particularly helpful when moving between darker sections of forest and brighter openings.
Photographers should test Auto ISO before the trek and understand the camera’s maximum ISO and minimum shutter-speed controls.
Exposure Compensation
Exposure compensation can be valuable when the camera’s meter is influenced by a complex mixture of dark vegetation and a relatively bright gorilla.
If the camera consistently produces images that are too dark or too bright, exposure compensation can provide a quick adjustment without requiring a complete change of exposure mode.
The exact adjustment should be determined by the scene and the camera’s metering behavior rather than by a fixed number.
Metering for Gorilla Photography
Modern cameras offer several metering options, including evaluative or matrix metering, center-weighted metering, and spot metering.
Evaluative or matrix metering can be a useful general-purpose choice because it considers a larger portion of the scene.
Spot metering can be useful in difficult lighting but requires greater understanding of where the camera is measuring exposure.
Autofocus Settings for Gorilla Photography
Autofocus is critical when photographing gorillas in dense vegetation because the subject may move unpredictably and the background can contain many objects that compete for focus.
Photographers should test different autofocus modes before the trip and select the configuration that reliably identifies the gorilla rather than branches or leaves.
Animal Eye Autofocus
Some modern cameras offer animal eye-detection autofocus. When supported and reliable with the photographer’s camera and lens combination, it can be useful for portraits.
However, dense vegetation can interfere with automated subject recognition. Photographers should therefore know how to switch to a conventional autofocus point or area when the camera struggles to identify the gorilla.
Single-Point Autofocus
Single-point autofocus can provide greater control when branches and vegetation make automatic subject detection unreliable.
The photographer can place the focus point deliberately over the gorilla’s eye or another important area of the subject.
This method requires practice because moving the focus point quickly can be more difficult during a short wildlife encounter.
Continuous Autofocus
Continuous autofocus can be useful when the gorilla is moving because the camera continually adjusts focus as the subject changes position.
It is particularly useful for walking, climbing, grooming, or interaction scenes where the distance between the photographer and subject changes.
Single Autofocus
Single autofocus can be effective when the gorilla is stationary and the photographer has time to compose carefully.
It can provide predictable focusing behavior for portraits, especially when the subject remains relatively still.
Focus on the Gorilla’s Eye
For close portraits, the eye is often the most important focus point because viewers naturally look toward the subject’s face.
Accurate eye focus can make the difference between a compelling portrait and an image that appears slightly soft.
When the gorilla is positioned farther away or partially hidden by vegetation, the photographer may instead need to focus on the most visually important part of the animal that is clearly visible.
White Balance for Gorilla Photography
Forest light can have strong green influences because light passes through vegetation before reaching the subject.
Photographers shooting RAW can generally leave white balance on Auto and make adjustments during processing. Those photographing JPEG files should pay more attention to the camera’s white-balance behavior.
RAW capture provides greater flexibility for correcting color later.
RAW vs JPEG for Gorilla Photography
RAW files provide considerably more flexibility for adjusting exposure, shadows, highlights, white balance, and color during post-processing.
For photographers who intend to produce high-quality prints or professional wildlife portfolios, RAW capture is generally the more flexible option.
JPEG can be convenient when smaller files and immediate sharing are priorities.
Burst Shooting for Gorilla Photography
Continuous shooting can help capture fleeting moments such as a gorilla turning its head, a juvenile interacting with another gorilla, or a silverback changing posture.
However, continuous shooting should not become uncontrolled machine-gun photography.
Photographers should watch the behavior, anticipate important moments, and use short bursts when appropriate.
Why Timing Matters More Than Continuous Shooting
A high frame rate does not automatically create better wildlife photographs.
The photographer still needs to recognize behavior, anticipate movement, compose the frame, and select the most meaningful moment.
Recent photography guidance recommends slowing down and observing the gorilla group before photographing rather than immediately firing continuously from the beginning of the encounter.
Image Stabilization Settings
If the camera or lens provides image stabilization, photographers should understand how it operates before entering the forest.
Stabilization can help reduce camera shake when photographing relatively stationary subjects at slower shutter speeds.
It cannot compensate for a gorilla moving during the exposure, so subject movement must still be considered when selecting shutter speed.
Flash Photography
Flash should not be part of the standard gorilla photography strategy. Current specialist guidance for Bwindi identifies flash photography as prohibited.
Photographers should disable automatic flash before entering the forest so that the camera cannot unexpectedly activate it during the encounter.
Natural Light Photography
Working with natural light is one of the central skills of gorilla photography.
Instead of trying to overpower the environment with artificial light, photographers should observe how light falls through the forest and adapt their exposure settings accordingly.
Soft, diffused light can create attractive portraits, while patches of brighter light can produce stronger contrast and dramatic environmental images.
Photography in Deep Shade
Deep shade usually requires a combination of wider aperture, higher ISO, or slower shutter speed.
The correct combination depends on whether the gorilla is moving.
When the subject is active, prioritize shutter speed. When the subject is stationary, the photographer may have more flexibility to use a slower shutter speed if camera movement can be controlled.
Photography in Bright Forest Light
When a gorilla moves into brighter light, the photographer should watch the exposure carefully.
Bright patches can produce strong highlights on the face or fur while the surrounding forest remains dark. Checking the histogram or highlight warnings can help identify exposure problems.
Photography During Rain
Rain can transform the appearance of the forest and create opportunities for distinctive photographs. Raindrops on foliage and wet fur can add texture and atmosphere.
However, photographers should protect their equipment and continue to follow all ranger instructions.
A rain cover can help protect the camera while allowing the photographer to continue working with natural light.
Photography Through Vegetation
Vegetation should not automatically be treated as an obstacle. Leaves, branches, and vines can help communicate the environment in which mountain gorillas live.
Instead of trying to eliminate every foreground element, photographers can sometimes use vegetation as a natural frame.
The important distinction is that photographers should work with the existing environment rather than damaging or moving vegetation for a clearer view.
Exposure Settings for Gorilla Portraits
Portraits generally benefit from careful focus on the face and eye, a shutter speed appropriate for the animal’s movement, and an aperture that provides sufficient depth of field.
A very wide aperture can produce beautiful background separation but may leave parts of the face outside the sharp zone.
The photographer should therefore balance artistic background blur against the need for sufficient subject detail.
Exposure Settings for Environmental Gorilla Photos
Environmental photographs should show more of the forest around the gorilla.
A slightly narrower aperture can sometimes provide additional depth of field, while a wider lens can include more habitat.
The objective is not simply to create a portrait but to communicate the relationship between the gorilla and its rainforest environment.
Settings for Gorilla Group Photographs
When several gorillas appear in the same frame, depth of field becomes more important.
If the animals are positioned at different distances from the camera, a very wide aperture may leave some individuals noticeably out of focus.
When light permits, stopping down slightly can increase the usable depth of field.
Settings for Silverback Photography
Silverbacks can provide powerful photographic subjects because of their size, posture, facial expression, and interactions with other members of the family.
Photographers should avoid assuming that the silverback will remain stationary. Even a seemingly relaxed animal can change position quickly.
Maintain a shutter speed appropriate to the behavior and use autofocus that can maintain focus through changing vegetation.
Settings for Juvenile Gorilla Photography
Juveniles can be particularly challenging because they may move quickly, climb, play, and interact with other members of the group.
Continuous autofocus and a faster shutter speed can be useful when the light permits.
Short bursts can help capture a sequence of movement without filling the memory card unnecessarily.
Settings for Gorilla Interaction Photography
Interactions between gorillas can produce some of the strongest storytelling photographs.
Because movement can be unpredictable, photographers should anticipate the interaction rather than waiting until it happens before changing every camera setting.
A moderately fast shutter speed and continuous autofocus can provide a useful starting point for this type of photography.
Check the Histogram
The histogram can help photographers evaluate exposure when the camera screen is difficult to interpret in changing forest light.
It can be particularly useful when the scene contains deep shadows alongside bright areas of fur or patches of sunlight.
Photographers should learn to interpret their camera’s histogram before the trek rather than trying to understand it for the first time during the gorilla encounter.
Use the Electronic Viewfinder or Optical Viewfinder Carefully
The viewfinder allows photographers to concentrate on composition while reducing distractions from the surrounding environment.
However, photographers should occasionally lower the camera and observe the gorillas directly. The goal is to document the encounter without becoming completely disconnected from it.
Do Not Let Settings Distract From the Experience
The perfect settings are less important than responding to the actual situation.
If the light suddenly changes, adjust. If the gorilla moves, adjust. If the ranger changes the group’s position, adapt.
Photography should remain flexible rather than becoming a rigid attempt to maintain one preset configuration throughout the entire encounter.
A Practical Starting Setup
A practical starting configuration for a photographer entering a dark forest could involve Aperture Priority or Manual mode, a relatively wide aperture, Auto ISO or a manually selected higher ISO, and a shutter speed fast enough to reduce subject movement.
The exact values should then be adjusted according to the camera, lens, available light, and gorilla behavior.
This approach is more reliable than treating any single online camera-setting recipe as universally applicable.
Why Camera Familiarity Matters
A photographer who knows where every important control is located can respond quickly to changing conditions.
Practice changing ISO without taking the camera away from the eye. Practice adjusting aperture. Practice selecting autofocus points. Practice switching between exposure modes.
These skills can save valuable time during the limited gorilla viewing period.
Practice in Similar Low-Light Conditions
Before traveling to Uganda, photographers should practice photographing subjects under tree cover, in shaded gardens, forests, or other low-light environments.
Practice should include moving subjects because the technical challenge is not simply obtaining enough light; it is obtaining enough light while maintaining a shutter speed capable of freezing subject movement.
Do Not Copy Another Photographer’s Settings Blindly
Camera settings that work for one photographer may fail for another because cameras, lenses, lighting conditions, and subjects differ.
A full-frame camera with a fast lens can behave differently from a crop-sensor camera with a slower zoom. A stationary gorilla requires different settings from a moving juvenile.
Use published settings as starting points, not as guarantees.
Gorilla Photography Settings and Weather
Weather can influence both exposure and equipment management. Cloud cover can produce soft, even light, while bright sunlight entering the forest can create strong contrast.
Rain can reduce available light further and make equipment protection essential.
Photographers should therefore remain prepared to change settings throughout the encounter.
How to Save Time With Custom Camera Presets
Some cameras allow users to save custom shooting modes. These can be useful for photographers who regularly move between different types of scenes.
A photographer might prepare one configuration for darker forest conditions and another for brighter scenes, provided the camera system supports this feature.
The important point is to configure and test these presets before the trek.
Camera Settings for Professional Wildlife Photography
Professional photographers should prioritize consistency, RAW capture, dependable autofocus, exposure control, and redundant equipment.
They should also create a workflow that minimizes time spent navigating menus during the encounter.
The more important the assignment, the more valuable it becomes to test the entire system before the trip.
Camera Settings for First-Time Gorilla Photographers
First-time photographers should keep the system simple.
A familiar exposure mode, reliable autofocus, Auto ISO where appropriate, RAW capture, and a shutter speed suited to subject movement can be easier to manage than an unnecessarily complicated configuration.
The photographer should spend more time observing the gorillas than constantly changing settings.
Final Camera Settings Strategy
The best camera settings for gorilla photography are not fixed numbers. They are a flexible combination of settings that keeps the gorilla sharp, properly exposed, and visually separated from distracting elements while respecting the changing conditions of the rainforest.
Start with a suitable aperture, establish a shutter speed appropriate for the animal’s movement, use ISO to compensate for low light, select a reliable autofocus configuration, disable flash, and monitor exposure as the light changes.
For additional preparation, photographers can review this Bwindi gorilla trekking experience and this Uganda versus Rwanda gorilla trekking guide when planning the wider photography trip.
Three Practical Rules to Remember
First, prepare your settings before reaching the gorillas.
Second, prioritize shutter speed whenever subject movement makes blur a risk.
Third, treat every setting as adjustable because the rainforest environment can change from one moment to the next.
The photographer’s goal is not to prove that a particular ISO, shutter speed, or aperture is superior. The goal is to be technically prepared enough to respond to the gorilla encounter without allowing camera settings to interfere with observation, ethical conduct, or the experience itself.
Information not found in current search results: an official Uganda Wildlife Authority specification requiring photographers to use a particular ISO, shutter speed, aperture, autofocus mode, metering mode, camera brand, or lens. These technical choices remain dependent on the photographer’s equipment and the conditions encountered during the trek.
Gorilla Photography Composition Techniques
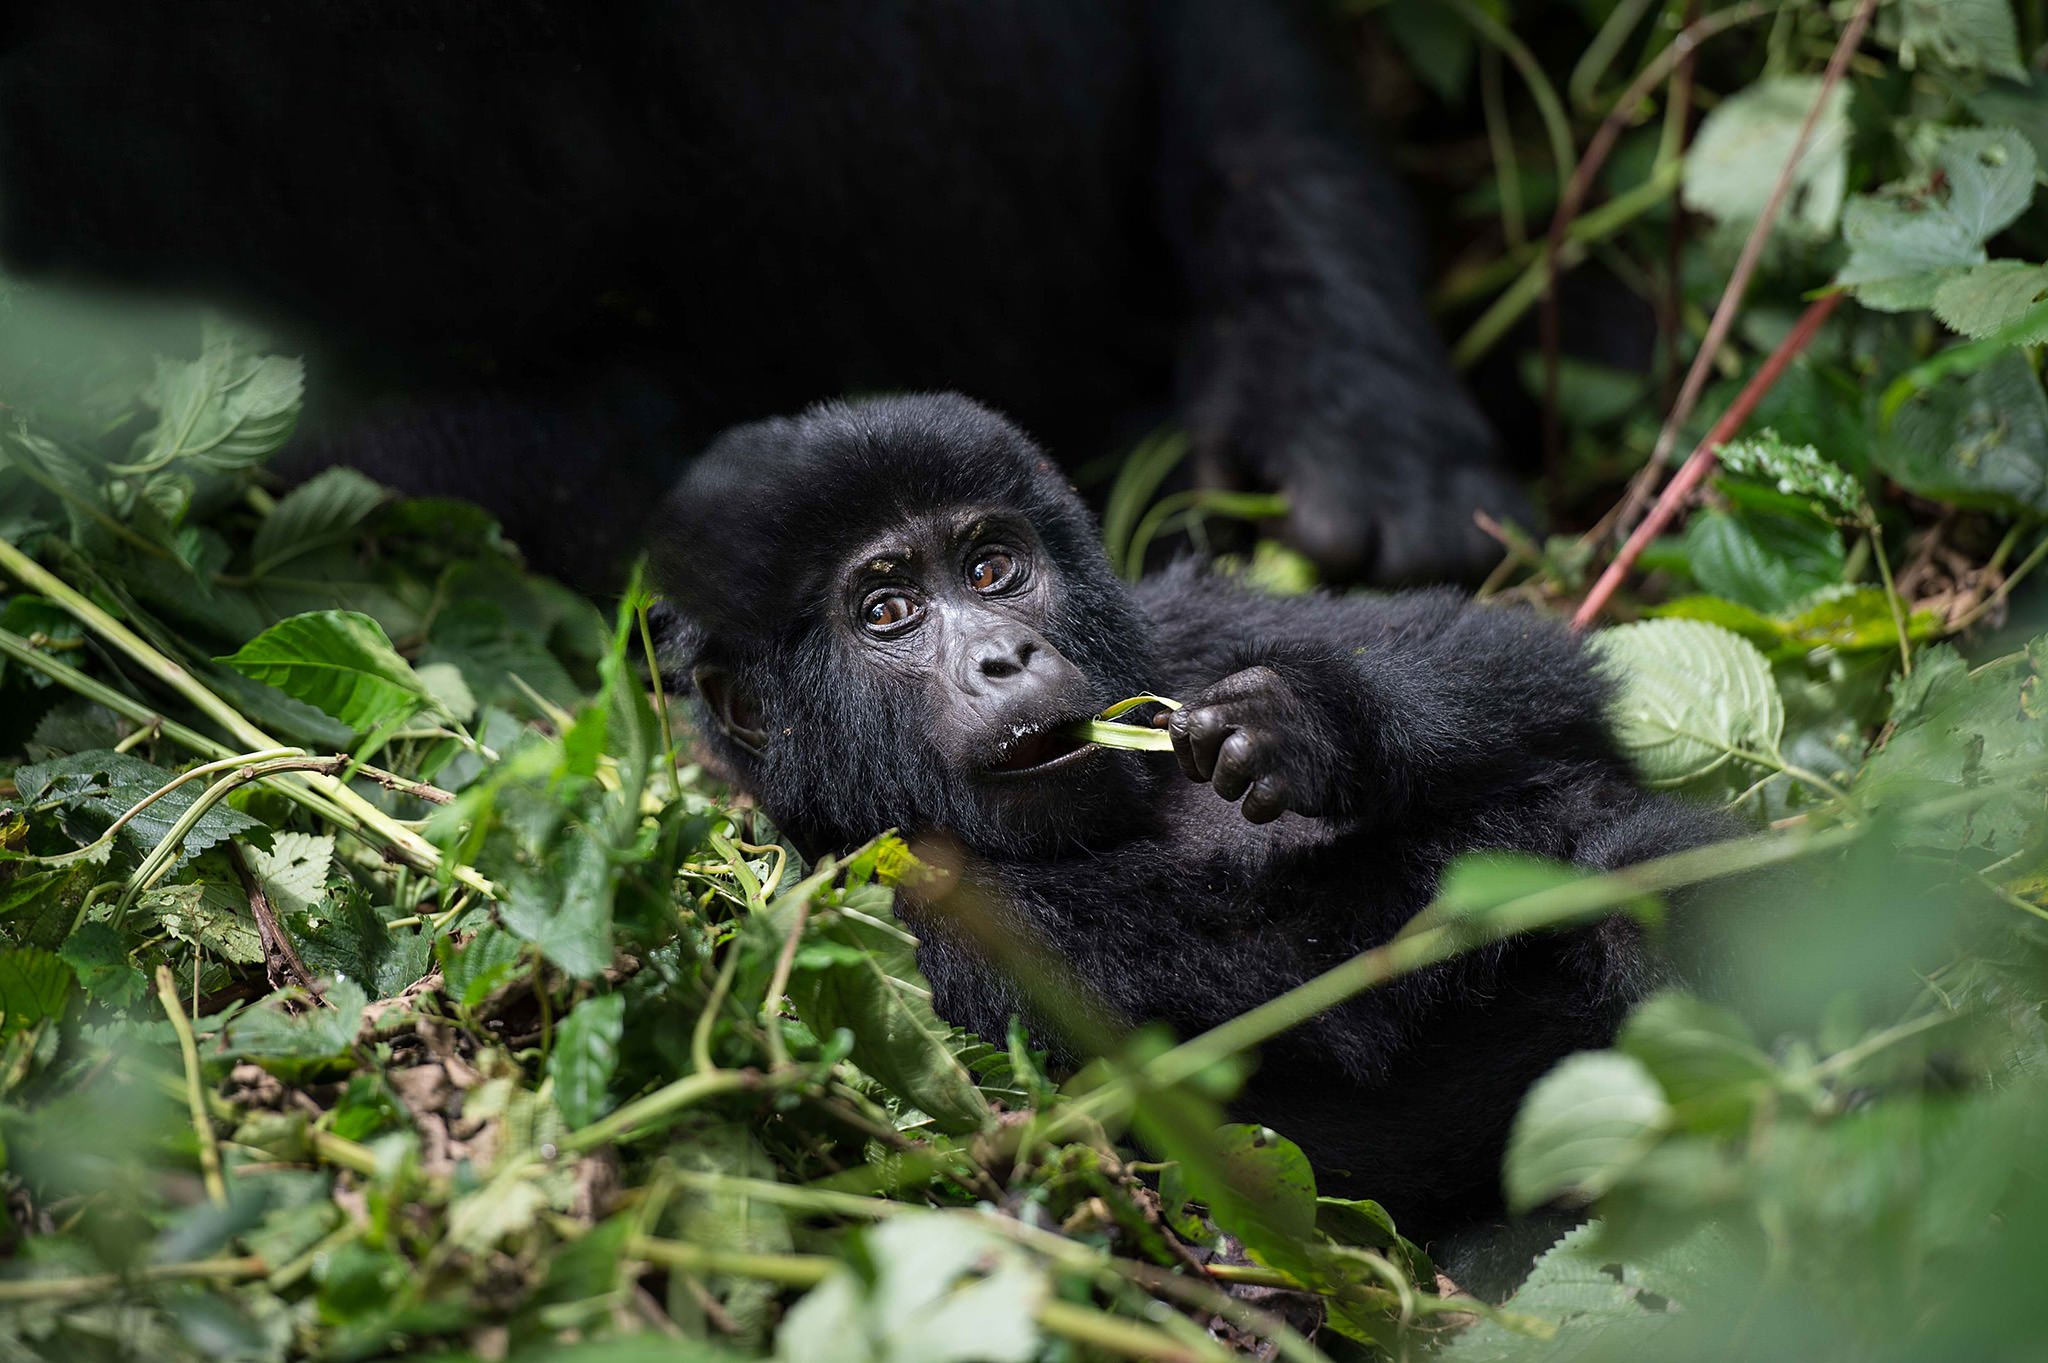
Soft out-of-focus leaves frame a juvenile eating in the jungle canopy.
Gorilla photography is not only about having the right camera and exposure settings. Composition determines how the viewer experiences the photograph. In the dense forests of Uganda, photographers must work with vegetation, changing light, unpredictable animal movement, and limited opportunities. Strong composition therefore comes from observation, patience, and adapting to the scene rather than trying to force the gorilla into a predetermined frame.
For photographers planning Bwindi gorilla trekking, understanding how to compose photographs before entering the forest can make the limited viewing period much more productive. Uganda Wildlife Authority states that normal gorilla tracking provides a maximum of one hour of viewing after the encounter, making preparation particularly important.
Why Composition Matters in Gorilla Photography
A technically sharp photograph can still be visually weak if the subject is poorly positioned within the frame. Composition determines what the viewer notices first, how the eye moves through the photograph, and how effectively the image communicates the environment and behavior of the gorilla.
Gorilla photography offers unusual compositional opportunities because the animals live within a complex rainforest environment. Leaves, branches, vines, tree trunks, mist, shadows, and layers of vegetation can become important visual elements rather than distractions.
Start With the Gorilla’s Natural Environment
One of the strongest approaches to gorilla photography is to include enough of the forest to communicate where the animal lives. A tightly cropped portrait can reveal facial expression and physical detail, but an environmental photograph can tell a broader conservation story.
Instead of automatically filling the entire frame with the gorilla, consider whether surrounding vegetation adds useful context. The forest can become part of the composition and help distinguish a genuine wildlife photograph from an isolated animal portrait.
Use the Rule of Thirds Carefully
The rule of thirds can provide a useful starting point for positioning a gorilla within the frame. Placing the subject slightly away from the center can create space and visual movement.
However, the rule of thirds should not become a rigid formula. A centered portrait can be extremely powerful when the gorilla is looking directly toward the camera, while an off-center composition can work better when the animal is looking or moving toward open space.
Leave Space in the Direction of the Gorilla’s Gaze
When a gorilla looks toward one side of the frame, leaving some open space in that direction can make the composition feel more natural.
This technique is particularly effective for portraits because it gives the viewer a visual destination and allows the animal’s gaze to become part of the story.
The amount of space required depends on the scene. Too much empty space can weaken the photograph, while too little can make the composition feel cramped.
Use Negative Space
Negative space can be especially effective when photographing a gorilla surrounded by dark vegetation or an uncluttered section of forest.
Rather than treating empty areas as wasted space, photographers can use them to emphasize the animal’s isolation, scale, or position within the rainforest.
Frame the Gorilla With Vegetation
Natural framing is one of the most useful composition techniques in gorilla photography. Leaves, branches, tree trunks, and gaps within the vegetation can create a visual frame around the animal.
This technique can make the image feel more immersive because the viewer sees the gorilla within its natural habitat rather than against an artificially simplified background.
Do Not Remove Vegetation for Composition
Photographers should work with existing vegetation rather than cutting, pulling, breaking, or rearranging plants to obtain a cleaner image.
The forest is part of the habitat being photographed. Responsible composition means adapting to that environment rather than modifying it for photographic convenience.
Use Foreground Vegetation Creatively
A leaf or branch partially covering the foreground does not necessarily ruin a photograph. When used carefully, foreground vegetation can create depth and make the viewer feel surrounded by the rainforest.
The photographer should distinguish between an element that creates atmosphere and one that completely obscures the subject. If the vegetation is distracting, changing composition from the permitted position may help.
Layer the Photograph
Rainforest scenes naturally contain multiple layers. The foreground may contain leaves, the gorilla may occupy the middle ground, and deeper vegetation can form the background.
Using these layers can create a stronger sense of depth than photographing the gorilla against a flat background.
Look for Natural Leading Lines
Tree trunks, branches, paths, vegetation patterns, and gaps in the forest can create lines that guide the viewer’s attention toward the gorilla.
These leading lines do not need to be obvious. Even subtle diagonal branches can help direct attention toward the subject.
Use Tree Trunks as Compositional Elements
Large tree trunks can provide vertical structure and help organize a complicated rainforest scene.
A gorilla positioned beside a trunk can create a visual relationship between the animal and its environment. The trunk may also provide a natural frame or divide the image into visual sections.
Look for Patterns in the Forest
Repeated leaves, branches, textures, and vertical tree forms can create patterns around the gorilla.
A strong photograph can use the animal as the point of visual difference within an otherwise repetitive environment. The gorilla then becomes the element that immediately attracts the viewer’s attention.
Use Contrast to Separate the Gorilla
Contrast can come from brightness, color, texture, shape, or depth.
If a gorilla’s face appears against darker vegetation, the difference in tone can naturally draw attention toward the face. Similarly, a textured animal surrounded by softer vegetation can create visual separation.
Watch the Background
Photographers often concentrate so intensely on the gorilla that they overlook distracting branches, bright leaves, or other visual elements behind the subject.
Before pressing the shutter, quickly check the entire frame. A small change in composition can sometimes remove a distracting element without requiring any movement toward the gorilla.
Use Background Blur
A wide aperture can reduce background detail and place greater visual emphasis on the gorilla.
This approach works particularly well for portraits where the background contains complicated vegetation. However, the photographer should avoid reducing the depth of field so much that important parts of the animal become unacceptably soft.
Environmental Portraits
An environmental gorilla portrait includes enough of the surroundings to establish context.
This approach is particularly valuable for conservation storytelling because it shows the animal as part of a rainforest ecosystem rather than presenting it as an isolated subject.
Tight Gorilla Portraits
A tight portrait concentrates attention on the face, eyes, fur, and expression.
These images can be visually powerful because the viewer has fewer competing elements. However, photographers should only use the framing that can be achieved from the permitted position and should never move closer simply to create a tighter portrait.
Include the Gorilla’s Hands
When the composition allows, including the gorilla’s hands can add information about posture and behavior.
A photograph of a gorilla feeding, resting, grooming, or interacting can become more informative when enough of the body remains visible to explain what the animal is doing.
Photograph Gorilla Body Language
Composition should respond to behavior. A photograph of a sitting gorilla requires a different frame from one showing an animal climbing or moving through vegetation.
Rather than waiting for the animal to fit a predetermined composition, photographers should observe behavior and adapt the framing accordingly.
Capture Eye Contact Naturally
Eye contact can create a strong connection between the subject and viewer.
However, photographers should never attempt to attract the gorilla’s attention simply to obtain eye contact. If the animal naturally looks toward the visitors, the photographer can use the moment. If it looks away, the resulting photograph can still be compelling.
Use the Direction of Movement
If a gorilla is walking, leave appropriate visual space ahead of the animal when the composition permits.
This creates a sense of movement and gives the viewer an impression of where the animal is going.
Movement-based composition is particularly useful for photographs showing gorillas traveling through the forest.
Capture Gorilla Family Interactions
Photographs of gorillas interacting can communicate social behavior more effectively than isolated portraits.
When two or more gorillas are interacting, consider the relationship between them. Avoid cropping one animal in a way that removes important context from the interaction.
Photograph Grooming Behavior
Grooming can produce intimate social photographs that reveal relationships within the group.
A wider composition can show both participants and their environment, while a tighter frame can emphasize facial expressions and physical interaction.
Photograph Juveniles Within the Group
Juvenile gorillas can provide energetic photographic opportunities because of their movement and interactions.
Rather than photographing juveniles only as individual subjects, consider compositions that show their relationship with adults or other young gorillas.
Photograph Silverbacks With Environmental Context
Silverbacks can make compelling subjects because of their physical presence, but environmental context can strengthen the photograph.
Including surrounding vegetation, terrain, and other members of the group can communicate the silverback’s position within the family rather than presenting the animal only as a portrait subject.
Use Vertical and Horizontal Orientations
Photographers should not restrict themselves to horizontal photographs.
Vertical framing can work particularly well for standing gorillas, portraits, and images that include tall vegetation. Horizontal framing may be better suited to environmental scenes, family groups, and photographs showing movement across the forest.
Change Orientation Before the Moment Happens
If the photographer anticipates that a particular subject will become a portrait, switching to vertical orientation before the moment occurs can prevent missed opportunities.
However, the photographer should prioritize awareness of the group and the ranger’s instructions rather than making rapid movements solely for composition.
Use Different Focal Lengths for Different Stories
A wider focal length can communicate habitat and environmental context, while a longer focal length can emphasize facial expression and details.
The advantage of a zoom lens is that the photographer can make this compositional change without physically approaching the gorilla.
Do Not Depend on Extreme Cropping
Modern cameras provide substantial cropping flexibility, but photographers should still aim for a strong composition in camera.
Heavy cropping can reduce image quality and remove important environmental information.
A properly composed image at capture time generally provides greater flexibility for high-quality prints and publication.
Use Layers to Tell the Gorilla’s Story
A strong environmental photograph can contain foreground vegetation, the gorilla in the middle ground, and additional forest layers behind it.
This approach can communicate the depth and complexity of the rainforest while maintaining the gorilla as the primary subject.
Look for Moments of Stillness
Not every strong photograph requires dramatic movement.
A quiet moment when a gorilla sits among the vegetation can produce a powerful portrait, particularly when the composition emphasizes the animal’s expression and the atmosphere of the forest.
Photograph the Gorilla Within the Landscape
The forest itself can become an important part of the photograph. Instead of treating vegetation as background clutter, use it to establish scale, habitat, and atmosphere.
This is especially valuable for photographers creating documentary or conservation-focused work.
Use Mist and Atmospheric Conditions
When mist or moisture is present, it can create atmospheric depth within the forest.
Photographers should avoid over-processing these conditions later. The natural atmosphere can be one of the defining characteristics of a rainforest photograph.
Compose Around Available Light
Light can determine where the strongest composition exists.
If a gorilla is naturally illuminated while the surrounding vegetation remains darker, the photographer can use the contrast to create a strong focal point.
When the subject moves into deeper shade, the composition may need to change accordingly.
Use Shadows Carefully
Shadows can add depth and mood to gorilla photography.
However, important facial features should remain sufficiently visible when the photograph is intended as a portrait. The photographer should balance atmospheric shadow with recognizable subject detail.
Avoid Distracting Bright Spots
Small patches of bright sky or sunlight can attract the viewer’s attention away from the gorilla.
Before capturing the image, check whether a slight change in framing can reduce these distractions while remaining in the permitted position.
Use the Gorilla’s Eyes as the Visual Anchor
In a portrait, the eyes can provide the primary visual anchor.
Accurate focus and thoughtful placement within the frame can make the photograph feel more engaging. If the gorilla is looking toward the viewer, eye placement becomes particularly important.
Do Not Center Every Photograph
Center composition can be effective, but using it for every photograph can make a portfolio repetitive.
Experiment with different compositions when opportunities naturally arise: centered portraits, off-center environmental images, vertical frames, horizontal scenes, and photographs using natural framing.
Build a Variety of Gorilla Photographs
A complete photography story should contain more than close-up portraits.
Consider creating a sequence that includes environmental photographs, family groups, individual portraits, behavioral images, details, movement, and quiet moments.
This creates a more complete visual record of the experience.
Think Like a Wildlife Storyteller
Before taking a photograph, ask what the image communicates.
Does it show the gorilla’s personality? Does it communicate habitat? Does it reveal behavior? Does it show a relationship? Does it explain something about the forest?
These questions can help photographers move beyond simply collecting attractive photographs.
Composition for Conservation Photography
Conservation photography often benefits from environmental context. Showing the gorilla within its habitat can communicate why forest protection matters.
Uganda Wildlife Authority identifies Bwindi and Mgahinga as Uganda’s mountain-gorilla destinations and emphasizes sustainable management of wildlife and protected areas.
Respect the Photographer’s Position
Composition must always be achieved from the position permitted by the ranger team.
Photographers should not move toward a gorilla, separate themselves from the group, block the animal’s path, or alter vegetation simply to improve composition.
The limitation can actually encourage creativity because the photographer must solve compositional problems using lens choice, timing, framing, and patience.
Patience Is a Composition Tool
Sometimes the best composition is not immediately available.
A gorilla may be partially hidden by vegetation, looking away, or positioned awkwardly. Rather than forcing the situation, wait and observe when permitted. The animal may naturally change position and create a clearer opportunity.
Do Not Chase the Perfect Photograph
Wildlife photography contains an element of uncertainty. The perfect photograph cannot be guaranteed.
A photographer who becomes obsessed with obtaining a particular composition may miss other natural moments occurring nearby.
Stay flexible and respond to what the gorillas actually do.
Use the Forest as Part of the Composition
The strongest gorilla photographs often combine animal behavior with the visual character of the rainforest.
Branches, leaves, trunks, shadows, mist, and layers of vegetation can all contribute to the final image when used deliberately.
The forest is not merely where the photograph happens. It is part of the photograph.
Composition Mistakes to Avoid
Common compositional problems include cutting off important parts of the animal unnecessarily, placing the subject against distracting vegetation, leaving awkward amounts of empty space, ignoring the direction of the animal’s gaze, and photographing every subject from exactly the same framing.
These problems can often be reduced through observation and deliberate framing before pressing the shutter.
Review Images Without Losing Awareness
Checking photographs can help identify exposure or focus problems, but photographers should avoid spending excessive time reviewing images while the gorillas are still nearby.
The encounter is limited, and important behavior can happen while the photographer is looking at the camera screen.
Think Before Pressing the Shutter
A short pause before taking a photograph can improve composition significantly.
Look at the subject, check the edges of the frame, identify distracting elements, consider the direction of the gaze or movement, and then capture the image.
This process becomes faster with practice.
Best Composition Strategy for Gorilla Photography
The most effective approach is to combine several techniques rather than relying on one formula. Use the rule of thirds when appropriate, leave space in the direction of movement or gaze, use natural framing, include habitat when it strengthens the story, and use tighter compositions when facial expression becomes the main subject.
Most importantly, adapt all of these techniques to the actual behavior of the gorilla.
Final Gorilla Photography Composition Principles
Great gorilla photography composition begins with observation. The photographer should understand the scene before deciding how to frame it.
Use the forest as a compositional asset, not something that must always be eliminated. Look for natural frames, leading lines, layers, patterns, contrast, and environmental context. Use appropriate space around the gorilla’s gaze or movement, vary horizontal and vertical compositions, and create a mixture of portraits and environmental photographs.
Above all, composition must remain subordinate to responsible wildlife photography. Uganda’s official guidelines limit normal gorilla viewing to a maximum of one hour, so preparation and efficient decision-making are essential.
Information not found in current search results: an official Uganda Wildlife Authority composition rule requiring photographers to use the rule of thirds, a specific focal length, a particular framing ratio, or a mandatory camera position. These are photographic techniques rather than official gorilla-tracking requirements.
Gorilla Photography Gear and Equipment for a Gorilla Trek
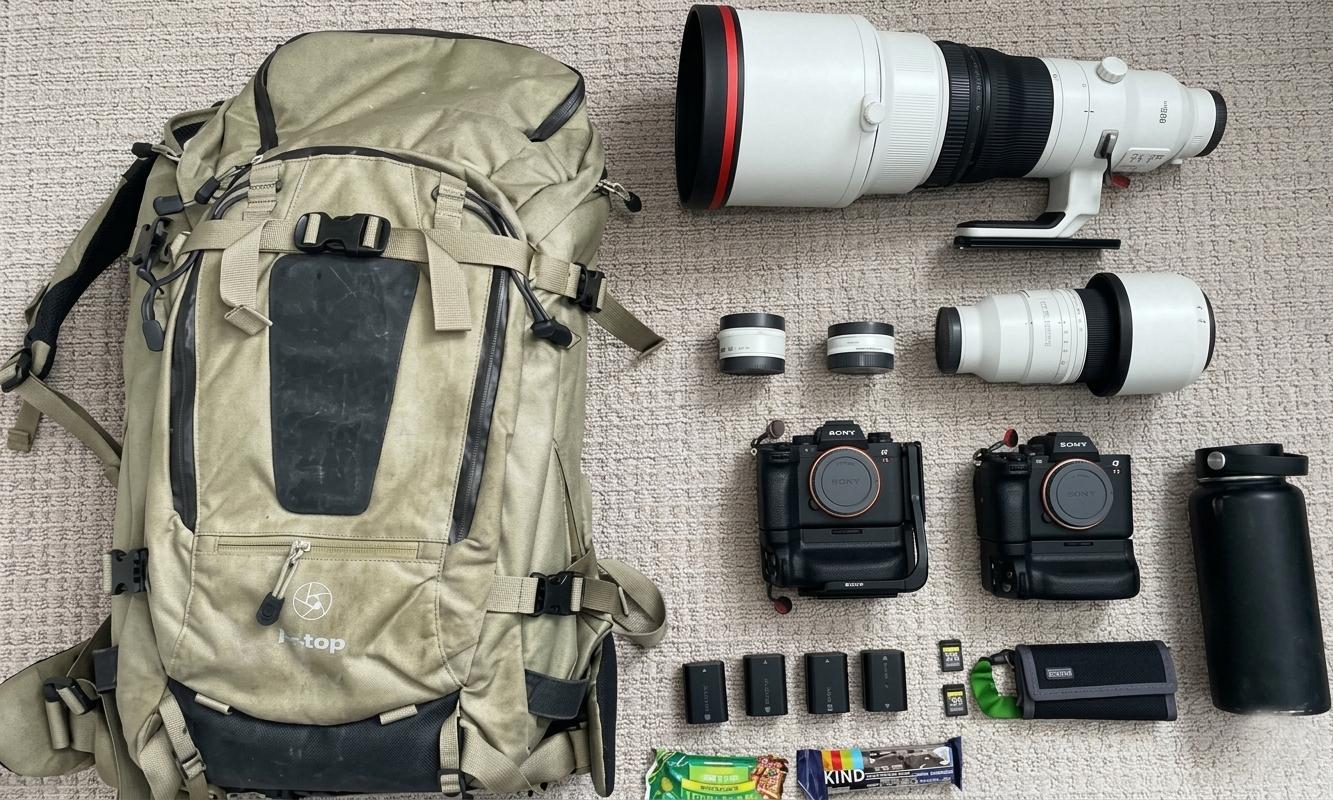
Essential camera gear and backpack ready for a gorilla trekking safari.
Choosing the right photography equipment can make a major difference when photographing mountain gorillas in Uganda. The objective is not to carry the largest possible camera bag into the rainforest. The better approach is to build a practical gorilla photography kit that provides enough focal-length flexibility, low-light capability, weather protection, battery capacity, and storage while remaining manageable during a demanding forest trek.
For photographers planning gorilla photography in Uganda, equipment selection should be based on the conditions that actually occur in Bwindi Impenetrable National Park and Mgahinga Gorilla National Park. Uganda Wildlife Authority confirms that gorilla tracking takes place in both parks, while normal tracking provides a maximum of one hour of gorilla viewing.
What Camera Is Best for Gorilla Photography?
There is no single camera model that is officially required for gorilla photography. A modern interchangeable-lens camera with dependable autofocus, good high-ISO performance, RAW capability, and suitable lenses can be effective.
The most important consideration is whether the photographer understands the camera and can operate it quickly. A technically advanced camera is of limited value if the photographer is unfamiliar with its autofocus, exposure, ISO, and drive controls.
Full-Frame Cameras for Gorilla Photography
Full-frame cameras can be advantageous in low-light forest conditions because many models provide strong high-ISO performance and a wide range of compatible lenses.
They can also provide excellent image quality for large prints and professional wildlife portfolios.
However, full-frame equipment can be heavier and more expensive than smaller camera systems, so photographers should balance image quality against the physical demands of the trek.
Crop-Sensor Cameras for Gorilla Photography
Crop-sensor cameras can also be highly effective for gorilla photography.
The smaller sensor format can provide additional apparent reach with telephoto lenses, which can be useful when the photographer needs to frame a distant subject without moving closer.
A crop-sensor camera can therefore be a practical option for photographers who already own one and know how to use it effectively.
Mirrorless Cameras for Gorilla Photography
Mirrorless cameras are increasingly popular for wildlife photography because of features such as electronic viewfinders, subject-detection autofocus, silent-shooting options on some models, and relatively compact bodies.
However, features vary considerably between cameras. Photographers should test their specific camera and lens combination before the trek rather than assuming that every autofocus or animal-detection system will perform identically in dense vegetation.
DSLR Cameras for Gorilla Photography
DSLR cameras remain capable wildlife-photography tools when paired with suitable lenses.
A photographer should not feel compelled to replace a reliable DSLR simply because mirrorless cameras are widely used. Familiarity, lens quality, autofocus reliability, and battery performance can matter more than the camera category itself.
Why a Zoom Lens Is Useful
A zoom lens is particularly practical during a gorilla trek because the photographer may need to move between environmental compositions and tighter portraits without physically changing position.
Uganda-focused photography guidance recommends a zoom-based approach and specifically discusses combinations such as a 70–200mm lens and a 24–70mm lens.
A zoom lens also reduces the temptation to move closer simply to achieve tighter framing.
Telephoto Lenses for Gorilla Photography
A telephoto lens can be useful for portraits, facial expressions, behavioral details, and gorillas positioned farther within vegetation.
The ideal focal length depends on the camera body, sensor size, available light, and the photographer’s preferred style.
A longer lens should never be viewed as permission to approach the gorillas more closely. Photographers must remain within the conditions established by the ranger team.
70–200mm Lenses
A 70–200mm lens is a versatile option for many wildlife photographers because it combines useful reach with the ability to pull back for wider compositions.
A fast aperture version can also be valuable in low-light forest conditions.
Its usefulness is greatest when the photographer wants to photograph individual gorillas while retaining enough flexibility to adjust framing as the animal moves.
24–70mm Lenses
A 24–70mm lens can be useful for environmental portraits, group photographs, habitat scenes, and images showing the relationship between gorillas and the surrounding forest.
It can also be useful when the photographer is close enough to the subject that a longer telephoto lens becomes unnecessarily restrictive.
Prime Lenses for Gorilla Photography
Prime lenses can provide excellent optical quality and wide apertures, making them attractive for low-light photography.
The disadvantage is reduced framing flexibility. Because the photographer cannot change focal length, composition may depend more heavily on the animal’s position and the permitted photographer position.
Prime lenses can therefore work well for experienced photographers who understand exactly how they want to photograph the encounter.
Wide-Angle Lenses
A wide-angle lens can be valuable for environmental photographs that emphasize the rainforest.
It can show the gorilla within a larger landscape and communicate the scale and density of the habitat.
However, photographers should avoid moving unnecessarily close simply because a wide lens requires a shorter working distance for a large subject in the frame.
Teleconverters
A teleconverter can increase the effective focal length of a compatible lens, but it also reduces the amount of light reaching the camera and can affect autofocus performance depending on the equipment.
Because forest conditions can already be dark, photographers should test the complete lens-and-teleconverter combination before relying on it.
Do You Need Two Cameras?
Two camera bodies can provide useful redundancy for photographers working on an important assignment.
If one camera develops a problem, the second body can prevent the entire photographic session from becoming dependent on equipment repair.
Uganda-focused gorilla photography guidance recommends carrying two cameras where practical and suggests using different focal-length ranges to reduce the need to change lenses in the forest.
One Camera Setup for Gorilla Photography
Photographers who prefer to travel lighter can use a single camera body with a versatile zoom lens.
This can reduce weight and simplify equipment management.
The disadvantage is that a camera failure becomes much more significant, so the photographer should inspect the equipment carefully and carry appropriate backup batteries and memory cards.
Extra Batteries
Extra batteries are among the most practical accessories for gorilla photography.
A long trek, cold or wet conditions, extensive autofocus use, image stabilization, electronic viewfinders, and frequent image review can all affect battery consumption.
Carry fully charged spare batteries and keep them protected from moisture.
Memory Cards
Photographers should carry sufficient memory-card capacity for the entire photographic session.
High-resolution RAW files and continuous shooting can consume substantial storage, particularly when several cameras are being used.
Use reliable memory cards that are compatible with the camera and test them before traveling.
Should You Carry Multiple Memory Cards?
Using multiple cards can provide practical redundancy.
If a single card fails or becomes corrupted, photographs stored on other cards remain available.
Photographers should also avoid filling a card completely before replacing it when the camera system and workflow allow sensible card management.
Camera Rain Protection
Rain protection is essential for gorilla photography because Bwindi is a rainforest environment and wet conditions can occur during a trek.
A dedicated camera rain cover can help protect the camera and lens while allowing the photographer to continue working.
Uganda-focused photography guidance specifically recommends rain-proof equipment and describes rain as a photographic opportunity rather than simply a reason to stop photographing.
Waterproof Camera Bags
A weather-resistant camera bag can help protect equipment while moving through wet vegetation.
The bag should be practical enough to carry comfortably and should allow rapid access to the camera without requiring the photographer to unpack the entire system.
Dry Bags and Protective Pouches
Additional waterproof storage can be useful for protecting memory cards, batteries, phones, and other small electronic accessories.
Even when the camera has weather sealing, a separate protective system provides an additional layer of security against rain and moisture.
Lens Cloths
Moisture, condensation, rain droplets, and vegetation can affect the front element of a lens.
Carry clean microfiber lens cloths and keep them protected from becoming wet before they are needed.
Lens Hood
A lens hood can help reduce stray light and provide some physical protection for the front element.
It can also reduce the likelihood of accidentally touching the front element when working in dense vegetation.
Binoculars for Gorilla Photography
Binoculars can be useful during the search for the gorilla group and when observing animals that are temporarily difficult to photograph.
They also encourage photographers to observe before immediately raising the camera.
Observation is important because the photographer can identify behavior and anticipate photographic opportunities before they happen.
Camera Strap or Harness
A secure camera strap can make carrying the camera through the forest easier.
Some photographers prefer harness systems that distribute weight across the body, while others prefer conventional straps.
The best option is the system the photographer has already tested and can use comfortably during extended movement.
Camera Backpack Considerations
A camera backpack should protect equipment without becoming unnecessarily heavy.
Because gorilla trekking involves walking through forest terrain, photographers should prioritize comfort, weather resistance, accessibility, and efficient organization.
Uganda-focused travel guidance also recommends keeping camera equipment protected from rain and carrying spare batteries and memory cards.
Do You Need a Tripod?
A full-size tripod is usually not the first piece of equipment a photographer should prioritize for a gorilla trek.
The forest environment, movement between locations, and need to remain mobile can make large support equipment inconvenient.
For most photographers, camera stabilization, appropriate shutter speed, and good low-light technique are more practical.
Monopods for Gorilla Photography
A monopod can provide some support while remaining more mobile than a tripod.
Whether it is useful depends on the photographer’s equipment and the specific trekking conditions.
Before carrying one, consider its weight and whether it can realistically be used without interfering with movement or the group.
Bean Bags and Alternative Supports
Small support accessories can occasionally be useful for wildlife photography, but their practicality during gorilla trekking is limited by the need to remain mobile.
Photographers should avoid carrying accessories simply because they are common in other wildlife photography environments.
Phone as a Backup Camera
A smartphone can provide a convenient secondary device for documenting travel moments outside the main photographic encounter.
However, photographers seeking serious wildlife images should not depend on a phone as the only camera for the gorilla encounter when a dedicated camera is available.
Drone Photography Around Gorillas
Drone use is a separate issue from handheld gorilla photography and should never be assumed to be permitted simply because a drone can technically operate in the area.
Uganda-focused information confirms that drone operations involve official procedures, particularly for remotely piloted aircraft, so photographers should obtain the necessary authorization before planning aerial filming or photography.
Information not found in the current official UWA search results: a general permission stating that visitors may freely fly drones over gorillas during ordinary trekking. Therefore, photographers should not treat ordinary gorilla trekking permission as drone authorization.
Do Not Use Flash
Flash should not be treated as a standard solution for dark forest conditions.
Instead, photographers should work with available natural light by adjusting aperture, shutter speed, ISO, and composition.
This approach also preserves the natural atmosphere of the rainforest.
Cleaning Equipment After the Trek
After returning from the forest, inspect the camera, lens, bag, and accessories for moisture, mud, leaves, and other debris.
Allow damp equipment to dry appropriately rather than sealing wet equipment immediately inside a completely closed container.
Condensation and Temperature Changes
Condensation can occur when equipment moves between significantly different temperatures or humidity levels.
Photographers should allow equipment to acclimatize gradually when moving between environments and avoid exposing sensitive electronics unnecessarily to sudden environmental changes.
Lens Changes in the Forest
Changing lenses in a wet, dusty, or vegetation-heavy environment can expose the camera sensor and equipment interiors to environmental contaminants.
A two-camera setup or a versatile zoom lens can reduce the need for frequent lens changes.
Uganda-focused gorilla photography guidance specifically advises against relying on frequent lens changes in the forest because of condensation concerns.
Camera Sensor Protection
The sensor is one of the most sensitive parts of an interchangeable-lens camera.
Reducing unnecessary lens changes is therefore a sensible equipment-management strategy during a rainforest trek.
If a lens change becomes necessary, photographers should follow their camera manufacturer’s recommendations and choose the cleanest, driest practical environment available.
Equipment for Low-Light Gorilla Photography
A lens with a relatively wide maximum aperture can be particularly useful beneath the forest canopy.
It allows more light to reach the sensor and can help the photographer maintain a suitable shutter speed without relying exclusively on very high ISO.
The trade-off is that fast-aperture lenses can be heavier and more expensive.
Lightweight Equipment vs Professional Equipment
The heaviest and most expensive equipment is not automatically the best choice.
Gorilla trekking can involve substantial walking and uneven forest terrain, so the photographer needs equipment that can be carried comfortably while remaining ready for sudden photographic opportunities.
A slightly lighter setup that the photographer can operate confidently may produce better results than a technically superior system that becomes tiring to carry.
Equipment for Long Gorilla Treks
UWA states that gorilla treks may last between approximately two and seven hours, although the actual duration varies by trek.
Photographers should therefore think beyond the brief encounter itself and consider the entire trek when deciding what equipment to carry.
Every additional lens, accessory, and support item contributes to the total weight carried through the forest.
Protecting Batteries From Moisture
Spare batteries should be kept secure and protected from rain.
They should also be stored in a way that prevents accidental contact between electrical contacts and conductive objects.
Protecting Memory Cards
Memory cards should be kept in a protective case when not installed in the camera.
Photographers should avoid unnecessary handling of cards in wet conditions and should maintain a simple workflow that reduces the possibility of losing small storage media.
Should Photographers Bring a Laptop?
A laptop is generally unnecessary during the actual gorilla trek.
For longer photographic trips, it may be useful for backing up images, but photographers should consider the weight and security implications before carrying additional electronics.
Where possible, important photographs should have a reliable backup strategy.
Backup Strategy for Gorilla Photographers
Photographers producing important work should think about image backup before traveling.
Multiple memory cards, a separate storage device, or another appropriate backup method can reduce the risk associated with equipment failure or accidental loss.
A backup strategy is particularly important when the trip involves a limited photographic opportunity that cannot easily be repeated.
Best Minimal Gorilla Photography Kit
A practical lightweight kit can consist of one capable camera body, one versatile zoom lens, spare batteries, sufficient memory cards, rain protection, a microfiber cloth, and a secure carrying system.
This setup keeps the equipment manageable while covering a broad range of photographic situations.
Best Professional Gorilla Photography Kit
A professional setup may include two camera bodies, a telephoto zoom, a wider zoom, spare batteries, multiple memory cards, weather protection, and a secure camera-carrying system.
The exact combination should be adapted to the photographer’s assignment, physical ability, camera system, and shooting style.
What to Leave Behind
Photographers should carefully question whether every accessory is necessary.
Heavy equipment that is unlikely to be used can make the trek more tiring without improving the final photographs.
The best gorilla photography gear is the equipment that provides meaningful photographic capability while remaining practical to carry and operate.
Gear Preparation Before Traveling to Uganda
Before departure, test every camera body, lens, battery, memory card, charger, rain cover, and carrying system.
Do not wait until arriving in Bwindi to discover that a battery is failing, a lens has autofocus problems, or a rain cover does not fit the camera.
Practical preparation is one of the easiest ways to reduce preventable photographic problems.
Practice With the Complete Camera Setup
Photographers should practice using the exact combination they intend to take into the forest.
Practice changing focal lengths, adjusting exposure, switching autofocus modes, replacing batteries, checking storage capacity, and protecting the camera from rain.
The goal is to make these actions automatic enough that they do not consume valuable photographic time.
Choose Equipment Based on the Photographer
Two photographers can approach the same gorilla trek with very different equipment and achieve excellent results.
The correct system depends on experience, physical comfort, budget, photographic objectives, and familiarity with the equipment.
There is no requirement to own the most expensive camera or longest lens to create meaningful gorilla photographs.
Final Gorilla Photography Gear Checklist
The most important equipment priorities are a reliable camera, an appropriate lens, sufficient batteries, adequate memory-card capacity, weather protection, and a comfortable carrying system.
Photographers should choose focal lengths that allow them to photograph both individual gorillas and the surrounding environment without needing to approach the animals unnecessarily.
For broader trip preparation, photographers can also review the verified Bwindi travel guide and Uganda gorilla filming guidance.
Equipment Should Support the Experience
The purpose of carrying photography equipment is to document the encounter, not to allow equipment to dominate it.
Uganda Wildlife Authority’s current guidelines provide a maximum viewing period of one hour for normal gorilla tracking and four hours for the Gorilla Habituation Experience.
That limited window makes preparation, equipment familiarity, and responsible photography more important than carrying excessive gear.
Information not found in current official search results: an official UWA requirement specifying a particular camera brand, lens focal length, camera body, tripod, monopod, memory-card capacity, or number of batteries for gorilla photography. These are photographer-specific equipment decisions rather than mandatory UWA equipment requirements.
Planning and Booking a Gorilla Photography Safari in Uganda
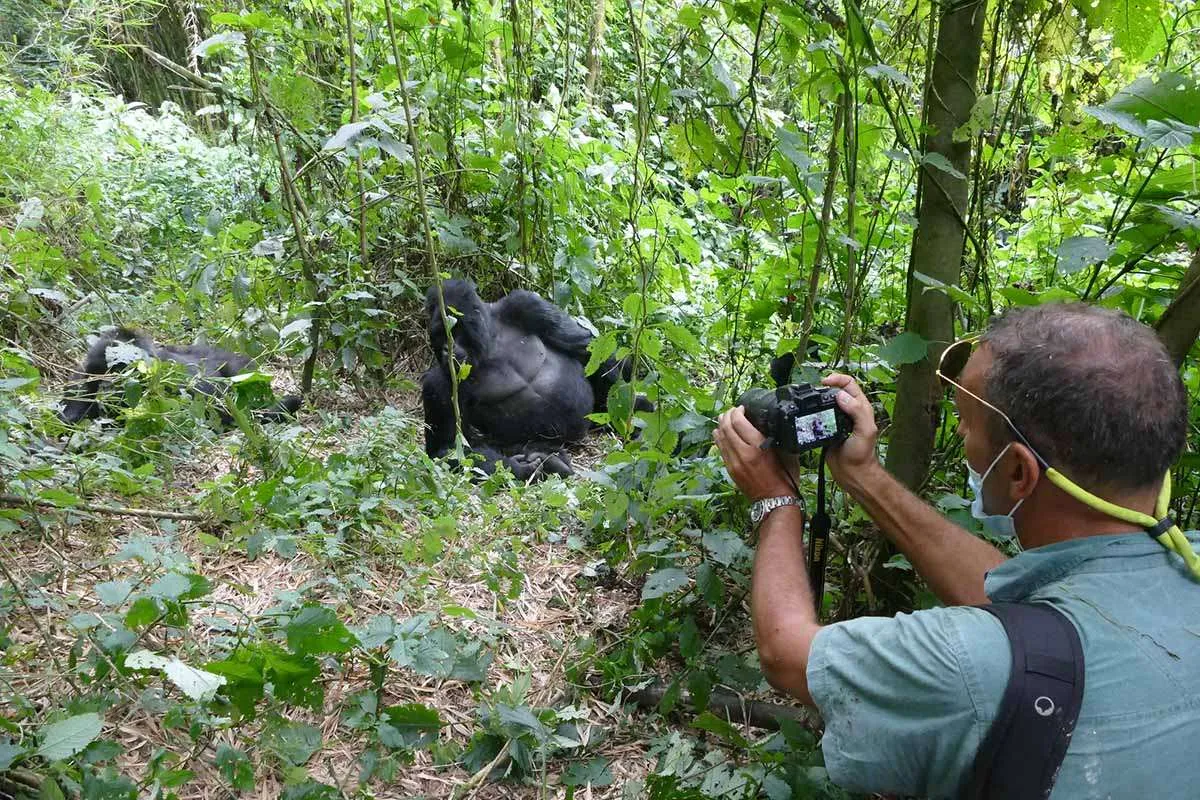
Gorilla trekking provides remarkable photography opportunities as visitors observe and photograph mountain gorillas in their natural forest habitat while following responsible trekking guidelines.
Planning a gorilla photography safari requires more than choosing a camera and booking a flight. Photographers need to coordinate gorilla permits, trekking sector, accommodation, transport, equipment, weather protection, photography objectives, and the limited time available with the gorillas. A well-planned trip allows the photographer to spend less time dealing with logistics and more time observing and photographing naturally occurring moments in the forest.
Uganda’s gorilla trekking takes place in Bwindi Impenetrable National Park and Mgahinga Gorilla National Park. Uganda Wildlife Authority currently identifies four main Bwindi sectors—Buhoma, Ruhija, Rushaga, and Nkuringo—and the Ntebeko/Muhavura entry point for Mgahinga.
Why Planning Matters for Gorilla Photography
Gorilla photography has several constraints that do not apply to ordinary wildlife photography. The animals live in dense mountain rainforest, weather can change rapidly, trekking can involve demanding terrain, and the actual gorilla observation period is limited.
UWA states that normal gorilla tracking provides one hour of observation once the gorilla family has been located, while the Gorilla Habituation Experience is a separate product that allows a longer period with the animals.
This makes preparation particularly important for photographers. Camera settings, batteries, memory cards, lenses, rain protection, and other equipment should be ready before the gorilla encounter begins.
Choose Between Gorilla Trekking and Habituation
Photographers should first decide whether the objective is a standard gorilla trekking experience or a Gorilla Habituation Experience.
Standard trekking provides a shorter viewing period and is suitable for photographers who want to document the encounter within the normal tourism framework. The habituation experience is designed around the process of habituating gorillas to human presence and provides a longer observation opportunity under the applicable management guidelines.
The longer duration can be attractive to photographers because additional observation time can provide more opportunities to document behavior, interactions, changing light, and environmental scenes. However, a longer experience does not guarantee a particular photograph.
Book the Gorilla Permit Before Finalizing the Photography Plan
A valid gorilla permit is essential for participating in the trekking experience. UWA’s current guidelines state that permits or tickets are booked according to the date and designated entry point, and visitors must use the designated tracking arrangements and authorized guides.
Photographers should therefore choose the intended trekking date and sector before building the rest of the itinerary around the encounter.
For additional permit information, photographers can review the verified gorilla permit information and compare it with the current official UWA guidance before making financial decisions.
Verify Permit Information Before Paying
Permit prices and purchasing procedures can change, so historical tourism articles should not automatically be treated as current pricing documents.
UWA’s published July 2024 advisory states that foreign non-residents should obtain gorilla and chimpanzee tracking permits through tour operators licensed by the Uganda Tourism Board, while foreign residents and East African Community citizens may purchase permits directly from UWA subject to its stated procedures. The same advisory says visitors should receive a UWA proforma invoice before making payment.
Photographers should therefore verify current permit procedures directly with UWA or through an appropriately licensed operator before paying.
Choose the Right Gorilla Trekking Sector
The choice of sector can affect the overall photography trip because each area provides a different logistical starting point and forest environment.
Bwindi has four principal trekking sectors: Buhoma, Ruhija, Rushaga, and Nkuringo. UWA’s current gorilla management guidelines identify these as designated entry points.
Rather than choosing a sector solely because another photographer obtained a particular photograph there, consider accessibility, accommodation, transport, trek objectives, and the overall itinerary.
Buhoma for Gorilla Photography
Buhoma is one of Bwindi’s established trekking areas and is located in the northern part of the park.
Photographers considering this sector should plan accommodation and transportation around the briefing location and allow sufficient time to arrive before the trek.
Destination-specific information is available in the verified Buhoma sector guide.
Ruhija for Gorilla Photography
Ruhija is located in the eastern part of Bwindi and provides another starting point for gorilla trekking.
Its location means photographers should consider the road journey and overnight accommodation carefully rather than assuming that every Bwindi sector has identical access times.
Rushaga for Gorilla Photography
Rushaga is one of the southern Bwindi trekking sectors and is particularly relevant to photographers considering the Gorilla Habituation Experience because UWA’s current information identifies Rushaga as one of the designated entry points within Bwindi.
Photographers interested in extended observation should verify the availability and current conditions of the specific habituation experience before planning the entire trip around it.
Nkuringo for Gorilla Photography
Nkuringo is another southern Bwindi sector. The terrain and access arrangements make it important to plan accommodation close enough to the starting point to avoid unnecessary early-morning transfers.
For photographers carrying substantial equipment, reducing unnecessary movement before the trek can make the overall experience more manageable.
Mgahinga for Gorilla Photography
Mgahinga Gorilla National Park provides another Ugandan location for mountain gorilla trekking.
UWA identifies Mgahinga and Bwindi as Uganda’s two gorilla-tracking destinations.
Photographers considering Mgahinga should research the current gorilla family allocation, permit availability, accommodation, transport, and trekking arrangements rather than assuming that conditions are identical to Bwindi.
Plan Accommodation Close to the Trekking Sector
Accommodation location is particularly important for photographers because the trek normally begins with preparation and a ranger briefing before entering the forest.
Staying near the relevant sector reduces the need for a long transfer immediately before the trek and provides additional time to prepare camera equipment.
For practical destination planning, the verified Bwindi travel guide provides additional information about access and equipment preparation.
Allow Extra Days Around the Photography Experience
A photographer should avoid designing an itinerary where the gorilla trek is immediately followed by a flight or another time-critical activity.
Mountain roads, weather, trekking duration, and other travel variables can affect the schedule. UWA states that gorilla treks may last approximately two to seven hours depending on circumstances.
Adding flexibility around the main photography day can make the trip less stressful.
Plan for a Long Trek
Photographers should prepare for the possibility that reaching the gorilla family may take several hours.
This means carrying sufficient water, suitable clothing, weather protection, and only the camera equipment that is genuinely useful.
The verified gorilla trekking packing guide provides additional preparation information for equipment and clothing.
Do Not Pack the Entire Camera Collection
Carrying every lens and accessory you own is rarely the most efficient strategy for a forest trek.
A carefully selected combination of camera bodies, lenses, batteries, memory cards, rain protection, and cleaning accessories is generally more practical.
Equipment should be chosen according to the photographic objective rather than the desire to carry as much technology as possible.
Prepare Camera Settings Before the Trek
Photographers should establish a starting camera configuration before reaching the gorillas.
Autofocus mode, ISO behavior, drive mode, RAW settings, white balance, exposure compensation, and image stabilization should be familiar before entering the forest.
This reduces the amount of time spent looking at menus when the photographic opportunity appears.
Prepare for Low Light
Dense forest canopy can produce challenging light. Photographers should therefore be comfortable working at higher ISO settings and with lenses that provide sufficient light-gathering capability.
The objective is not to eliminate image noise completely. A slightly noisy photograph can still be valuable, while a blurred photograph caused by insufficient shutter speed may be difficult to recover.
Prepare for Rain
Rain is a realistic possibility during a gorilla photography safari.
Photographers should protect camera bodies, lenses, memory cards, batteries, and other electronics with suitable weather-resistant equipment.
UWA’s older Bwindi visitor information also describes Bwindi as a wet environment and notes that wet-weather gear is important.
Use Weather as Part of the Photography Strategy
Photographers should not automatically view rain as a failed photography day.
Wet vegetation, mist, droplets, and changing forest light can contribute to distinctive environmental photographs.
However, weather should be treated realistically: protect equipment and prioritize safe movement rather than taking unnecessary risks for a photograph.
Choose the Right Photography Season
Gorilla trekking is available throughout the year, but seasonal weather can affect trail conditions and photographic conditions.
UWA notes that Uganda is a wet country and that rain can affect forest activities.
For photographers, the decision between wetter and generally drier periods should consider both trail conditions and desired photographic atmosphere. Cloudy conditions can provide softer light, while brighter conditions can introduce stronger highlights and shadows.
Dry Season Photography
Drier periods can make forest trails more manageable, although weather is never guaranteed in a tropical mountain rainforest.
Photographers may find it easier to protect and operate equipment when conditions are less wet, but should still carry rain protection.
Wet Season Photography
Wetter periods can provide atmospheric forest conditions, rain, mist, wet vegetation, and saturated environmental colors.
Photographers choosing this period should be particularly disciplined about waterproofing equipment and protecting memory cards and batteries.
Do Not Choose a Date Based Only on Weather Forecasts
Mountain rainforest weather can change quickly, so a forecast should not be interpreted as a guarantee of conditions during the trek.
The better strategy is to prepare for both rain and dry conditions regardless of the season.
Build a Photography Backup Plan
A photography itinerary should have alternatives in case of equipment problems, weather-related travel changes, or other logistical difficulties.
Extra batteries and memory cards are essential, while a second camera body can provide valuable redundancy for photographers working on professional assignments.
Carry Sufficient Memory
Behavioral photography can generate many images because photographers may use short sequences to capture movement and interactions.
Carry enough reliable memory capacity for the full trip and avoid depending on a single memory card.
Carry Spare Batteries
Battery capacity can be affected by extensive autofocus use, image stabilization, electronic viewfinders, image review, and cool forest conditions.
Fully charged spare batteries should remain protected from moisture and should be readily accessible.
Protect the Camera During Trekking
The camera should be accessible without compromising protection from rain and vegetation.
A practical rain cover or weather-resistant camera bag can allow the photographer to move through the forest while keeping equipment protected.
Plan Your Lens Strategy
Photographers should decide before the trek whether they will use one versatile zoom, two bodies with different lenses, or another system suited to their equipment.
Changing lenses repeatedly in humid forest conditions can introduce unnecessary risk and consume valuable time.
Destination-specific gorilla photography guidance discusses using versatile focal lengths and minimizing unnecessary lens changes.
Plan for Environmental Portraits
A photography safari should not be planned entirely around close-up portraits.
Include environmental photographs showing gorillas within the forest, as well as images of vegetation, terrain, mist, and other details that establish the setting.
Plan for Behavioral Photography
Photographers should be prepared to document natural behaviors rather than waiting exclusively for dramatic poses.
Feeding, grooming, resting, climbing, walking, and interactions between family members can all contribute to a complete photographic story.
Plan for the Limited Viewing Period
Once the gorilla family has been located, the photographer should already know the basic camera controls.
UWA’s current guidance states that normal gorilla tracking provides one hour of observation with a habituated family.
The first minutes should not be lost to equipment setup. The camera should be ready before the encounter begins.
Do Not Expect a Specific Photograph
Wildlife photography is unpredictable. A particular gorilla may remain hidden, light may change, vegetation may obstruct the subject, or the animals may move away.
A successful photography safari should therefore be measured by the quality of the overall experience and photographic story rather than by obtaining one predetermined image.
Plan Your Transport to Bwindi
Transport planning should be based on the specific sector rather than simply using “Bwindi” as a single destination.
UWA’s current park information identifies different approaches to the northern and southern parts of the park and notes that road conditions can require appropriate vehicles.
Photographers with expensive equipment should allow adequate travel time and avoid unnecessarily tight connections.
Plan Your Arrival Day
The day before the trek should ideally be used to reach the appropriate area, settle into accommodation, check equipment, charge batteries, format or replace memory cards, and prepare clothing.
This is preferable to arriving late and attempting to prepare everything immediately before the trek.
Check the Equipment the Evening Before
Inspect camera bodies, lenses, batteries, memory cards, rain covers, straps, and bags.
Confirm that batteries are charged, cards have sufficient space, and weather protection fits the actual camera and lens combination.
Prepare a Simple Photography Workflow
A simple workflow can be more reliable than a complicated one. The photographer should know which camera to use first, which lens is attached, where spare batteries are stored, and where memory cards are kept.
This organization becomes especially valuable when the encounter develops quickly.
Consider a Second Camera Body
Photographers working on important assignments may benefit from carrying a second camera body.
A second body can also allow two different focal-length ranges to remain available without changing lenses.
However, carrying two bodies increases weight, so the decision should be based on the photographer’s objectives and physical ability.
Plan for Photography Without Flash
Flash should not be part of the gorilla photography strategy. Current UWA guidance prohibits flash photography during gorilla tracking.
Photographers should therefore practice low-light photography before traveling and become comfortable with higher ISO settings and appropriate shutter speeds.
Plan for Responsible Photography
The photographic plan should always fit within the wildlife rules.
Do not design a shot that requires approaching the gorillas, separating from the group, manipulating vegetation, making sounds, or ignoring ranger instructions.
The best photography plan is one that works entirely within the established conservation framework.
Use a Long Lens Instead of Moving Closer
A suitable telephoto lens can provide tighter compositions without requiring the photographer to approach the animals.
This makes focal-length selection an important part of responsible photography.
The verified gorilla photography equipment guide provides additional discussion of camera bodies, telephoto lenses, weather protection, and low-light photography equipment.
Plan for Responsible Interaction
Photographers should remember that the animals determine the natural encounter. If a gorilla moves, the photographer should adapt from the permitted position rather than pursuing it.
Observation should remain more important than obtaining a particular frame.
Consider Travel Insurance and Document Security
A photography trip involves valuable equipment and international travel logistics. Photographers should keep copies of important travel documents and consider appropriate travel insurance for the trip.
Insurance terms vary, so the photographer should verify that the chosen policy actually covers the equipment and activities involved.
Plan Around the Photographer’s Physical Ability
Camera equipment adds weight to a trek that can already involve steep and uneven terrain.
UWA describes gorilla trekking as requiring moderate fitness and notes that treks can last approximately two to seven hours.
A photographer should therefore select equipment that can be carried comfortably for the expected duration rather than building a kit based solely on maximum photographic capability.
Use a Porter When Appropriate
Travelers may choose to hire a porter to assist with carrying equipment and other belongings during the trek. This can be particularly useful for photographers carrying heavier camera systems.
Porter arrangements and fees should be confirmed locally through the appropriate trekking or tourism channels.
Plan the Photography Story Before the Trip
Having a broad photographic story in mind can improve the final collection.
Consider documenting the forest, trekking environment, gorilla family, individual animals, behavior, portraits, environmental scenes, and small details rather than concentrating exclusively on close-up faces.
Create a Shot List Without Becoming Rigid
A simple mental shot list can help the photographer remember different types of images, but it should never become a reason to ignore what is actually happening.
Wildlife photography rewards flexibility. If an unexpected natural behavior occurs, respond to that opportunity rather than continuing to follow a predetermined sequence.
Plan for Post-Processing
Photographers should think about how their images will eventually be used. Images intended for large prints may require different framing and resolution considerations from images intended for web publication.
Recording photographs in RAW format can provide greater flexibility during post-processing when the camera supports it and the photographer’s workflow is designed for RAW files.
Keep Accurate Photograph Information
Professional photographers should preserve the date, location, camera information, and other useful metadata associated with photographs.
Accurate records are particularly valuable for conservation, editorial, educational, and professional photography projects.
Plan Ethical Publication
When publishing photographs, captions should accurately describe what was observed.
Photographers should avoid exaggerating behavior or presenting a staged or manipulated photograph as a natural wildlife encounter.
Plan the Complete Uganda Photography Itinerary
Gorilla photography can be combined with other wildlife and landscape photography opportunities in Uganda.
However, photographers should avoid creating an itinerary so tightly packed that delays or a long gorilla trek make the remaining schedule impractical.
Allowing adequate time between activities creates a more reliable and enjoyable photographic journey.
Consider Bwindi’s Wider Biodiversity
Bwindi is not only a gorilla destination. UWA’s current park information describes a wider ecosystem containing numerous mammals, birds, butterflies, reptiles, and amphibians.
Photographers can therefore build a broader forest photography portfolio that places the gorillas within their ecological setting.
Plan for Community and Conservation Photography
Responsible tourism can also provide opportunities to document the wider conservation story, including communities and tourism activities surrounding the protected area.
UWA states that revenue-sharing mechanisms support communities around protected areas and that tourism contributes to community development initiatives.
When photographing people, photographers should seek appropriate permission and treat individuals respectfully.
Book With Verified Operators
For foreign non-residents, UWA’s July 2024 advisory states that gorilla and chimpanzee tracking permits are sold exclusively through tour operators licensed by the Uganda Tourism Board.
Photographers should therefore verify the status of the operator before making payments or sharing important travel documents.
Confirm the Booking Documentation
Keep the relevant permit confirmation, booking information, passport details, accommodation information, transport arrangements, and emergency contacts organized in both digital and accessible backup formats.
UWA’s advisory specifically recommends receiving a proforma invoice confirming the reservation before making payment.
Do Not Depend on Old Permit Information
Gorilla permit prices, booking arrangements, and tourism regulations can change. Photographers should therefore check current information before every trip.
Historical articles can provide useful background, but the current official UWA information should take priority when confirming regulations, permit procedures, and applicable requirements.
Final Planning Strategy for Gorilla Photographers
The strongest gorilla photography safari begins with realistic planning. Select the right trekking experience, secure the appropriate permit, choose a practical sector, book suitable accommodation, arrange reliable transport, prepare for rain and low light, simplify the camera kit, and understand the photography rules before entering the forest.
Most importantly, plan around the animals rather than expecting the animals to fit the photographic plan. The encounter is unpredictable, and the photographer’s responsibility is to adapt while respecting the gorillas, the forest, the ranger team, and fellow visitors.
For additional preparation, photographers can review gorilla photography guidance, Bwindi travel information, and trekking preparation advice.
Information not found in current official search results: a UWA rule giving professional photographers a separate permit, guaranteed photography-only trekking group, guaranteed photographic position, guaranteed gorilla family, or guaranteed photographic conditions. Photographers should therefore plan within the normal applicable gorilla tourism framework unless UWA confirms a specific arrangement in writing.
Section 14: Final Gorilla Photography Guide — How to Prepare, Photograph Responsibly, and Capture Exceptional Images
Gorilla photography in Uganda combines wildlife observation, rainforest exploration, technical photography, and conservation responsibility in one extraordinary experience. Photographing mountain gorillas is very different from photographing animals in an open savannah environment because the photographer must work within a dense forest, changing light, unpredictable weather, limited viewing time, natural vegetation, and strict wildlife-viewing rules.
The strongest mountain gorilla photography does not depend simply on owning an expensive camera. It depends on preparation, patience, appropriate equipment, understanding light, anticipating behavior, composing carefully, and respecting the animals throughout the encounter.
What Makes Gorilla Photography Different From Other Wildlife Photography?
Gorilla photography presents a distinctive combination of challenges. The animals are usually encountered in thick vegetation rather than open landscapes, available light can change quickly, and photographers must remain within the rules established for gorilla viewing.
UWA states that gorilla trekking in Uganda takes place in Bwindi Impenetrable National Park and Mgahinga Gorilla National Park. Normal trekking may last approximately two to seven hours, while the actual observation period with a habituated gorilla family is limited to one hour.
This means photographers need to be ready before the gorillas are located. Camera settings, lenses, batteries, memory cards, rain protection, and carrying systems should already be organized.
Prepare Your Camera Before Entering the Forest
The best time to discover that your camera settings are unsuitable is before the trek, not when the gorillas are already in front of you.
Test your camera in low light before traveling. Practice changing ISO, shutter speed, aperture, autofocus modes, exposure compensation, and drive modes without looking through the camera menu.
You should be able to make basic adjustments quickly while still paying attention to the animals and ranger instructions.
Choose a Practical Gorilla Photography Kit
A practical kit can consist of one reliable camera body, a versatile telephoto lens, spare batteries, several memory cards, rain protection, a comfortable carrying system, and basic lens-cleaning equipment.
Professional photographers may choose two camera bodies and several lenses, but carrying more equipment does not automatically produce better photographs.
The verified gorilla trekking packing guide can be used alongside the photography plan to ensure that camera equipment does not replace essential trekking gear.
Choose Your Lens According to Your Photography Goal
A telephoto zoom is particularly useful because it allows photographers to change composition without moving toward the gorillas.
A 70–200mm-type lens can provide useful flexibility for relatively close encounters, while longer zooms can provide additional reach when animals are farther away or partially concealed by vegetation.
A wider lens can complement the telephoto by documenting gorillas within their forest environment.
Use Long Lenses Without Breaking Wildlife Rules
A long lens should never be considered permission to ignore the required viewing distance.
UWA’s published gorilla tracking rules specify a seven-metre minimum distance and prohibit flash photography.
The purpose of a telephoto lens is therefore to make responsible photography easier, not to encourage closer approaches.
Prepare for Low-Light Photography
Forest conditions can be significantly darker than the surrounding landscape. Thick vegetation can block direct sunlight, while clouds and mist can reduce available light even further.
Photographers should be comfortable raising ISO when necessary rather than allowing shutter speed to fall so low that subject movement produces unusable photographs.
Prioritize Sharpness Over Extremely Low ISO
Wildlife photography often involves a choice between ISO noise and motion blur.
A photograph with moderate high-ISO noise can frequently be improved during post-processing. A photograph with significant motion blur may be much more difficult to recover.
For moving gorillas, use a shutter speed appropriate to the movement and focal length rather than choosing a very slow shutter speed simply to keep ISO low.
Use Wide Apertures Carefully
A wide aperture can help in low light and can separate the gorilla from distracting vegetation.
However, extremely shallow depth of field can also make it difficult to keep the entire face or multiple animals sharp.
When photographing groups or interactions, consider whether additional depth of field is more important than maximum background blur.
Learn to Read Forest Light
Good gorilla photography often depends more on recognizing light than on finding a technically perfect camera setting.
Look for soft light passing through vegetation, naturally illuminated faces, areas where the background is darker than the subject, and openings in the canopy that create separation.
Avoid forcing the photograph when the subject is positioned in extremely harsh or uneven light.
Use Natural Vegetation as Part of the Composition
Branches, leaves, vines, and vegetation are not necessarily obstacles. They can provide depth, framing, and context.
A gorilla partially surrounded by vegetation can communicate the reality of the rainforest more effectively than an artificially isolated subject.
Instead of removing vegetation, wait for the gorilla to move naturally or adjust your framing from the permitted position.
Photograph More Than the Silverback
The dominant silverback often attracts immediate attention, but a complete gorilla photography story should include more than one animal.
Look for mothers with young, juveniles playing, grooming interactions, feeding behavior, resting animals, movement through vegetation, and interactions between members of the family.
These photographs can create a richer visual record of the gorilla family.
Photograph Gorilla Behavior Instead of Only Faces
A technically excellent portrait is valuable, but behavior often provides the stronger story.
Watch for natural interactions and anticipate moments rather than photographing randomly.
Expressions, gestures, grooming, feeding, movement, and family interactions can reveal personality and social relationships.
Give Yourself Time to Observe
Do not spend the entire encounter looking through the viewfinder.
Lower the camera occasionally and observe what the gorillas are doing. This can help you predict where the next interesting moment may occur.
Observation also reduces the temptation to photograph continuously without considering composition.
Make Every Minute of the Encounter Count
UWA’s current guidelines establish a maximum viewing time of one hour for normal gorilla tracking and up to four hours for the Gorilla Habituation Experience.
Because normal viewing time is limited, photographers should arrive prepared rather than spending the first part of the encounter changing lenses, formatting cards, or searching through camera menus.
Do Not Chase the Perfect Photograph
The gorillas determine what happens during the encounter.
An animal may turn away just as you prepare to press the shutter. Another may disappear behind vegetation. A sudden change in weather may alter the light.
These are normal elements of wildlife photography.
Accepting them allows the photographer to remain patient and responsive rather than attempting to control the encounter.
Never Sacrifice Gorilla Welfare for a Photograph
This is the most important rule in the entire guide.
UWA’s gorilla tracking rules require visitors to maintain the prescribed distance, prohibit flash photography, prohibit eating and drinking while with the gorillas, and require visitors to follow the established wildlife-viewing conditions.
No photograph is worth breaking these rules.
Never Use Flash Photography
Flash photography is specifically prohibited under UWA’s published gorilla tracking rules.
Prepare for the forest’s available light instead. Increase ISO when necessary, select an appropriate aperture, and use a suitable shutter speed.
Respect the Required Distance
Photographers should use focal length and composition to work from the permitted position rather than attempting to move closer.
If a gorilla naturally approaches the group, do not use the event as an excuse to move toward it. Follow the ranger’s instructions and allow the animal to determine the interaction.
Follow Your Ranger’s Instructions
The ranger team manages the encounter and provides instructions about movement, positioning, distance, and visitor behavior.
Photographers should never prioritize their composition over those instructions.
Keep Other Visitors in Mind
Gorilla photography is a shared experience. Professional photographers should avoid blocking other visitors or attempting to monopolize the best viewing position.
Good field etiquette includes sharing opportunities, moving when instructed, and allowing others to experience the gorillas without unnecessary interference.
Protect Your Equipment From Rain
Rain is part of the mountain rainforest environment, so weather protection should be treated as standard photographic equipment rather than an optional luxury.
Use a camera rain cover or other suitable protection and keep spare batteries and memory cards protected from moisture.
The verified Uganda gorilla photography resource also highlights rain as an important photographic condition and recommends preparing equipment for wet forest environments.
Use Rain as a Photographic Opportunity
Rain does not automatically mean poor photography.
Raindrops can emphasize fur texture, create atmospheric backgrounds, and provide a stronger sense of the rainforest environment.
Instead of treating every weather change as a problem, photographers can adapt their settings and compositions to the conditions.
Protect the Camera From Condensation
Humidity and temperature differences can create condensation on lenses and camera equipment.
Keep equipment protected when moving between substantially different environments and avoid repeatedly opening camera bags unnecessarily in wet conditions.
Carry Enough Batteries and Memory
Wildlife photography can consume batteries quickly because of autofocus, electronic viewfinders, image stabilization, and repeated shooting.
Carry enough charged batteries for the day and use multiple memory cards rather than depending on one card.
The verified gorilla photography equipment guide provides additional equipment considerations for photographers preparing for challenging forest conditions.
Use a Simple Camera Workflow
A simple workflow reduces mistakes.
Before the trek, format the appropriate memory card, charge batteries, clean lenses, check weather protection, confirm autofocus settings, and verify that the camera is operating correctly.
During the trek, concentrate on photographing rather than repeatedly changing unnecessary settings.
Photograph the Gorilla and the Forest
The strongest portfolio will usually contain a mixture of photographs.
Include close portraits, medium compositions, environmental images, family interactions, habitat details, movement, feeding, grooming, and wider scenes that communicate the atmosphere of the forest.
This creates a complete visual narrative rather than a collection of nearly identical portraits.
Create a Story From the Photography Experience
A professional photography sequence can begin with the forest, introduce the trekking environment, reveal the gorillas, document their behavior, and finish with wider environmental photographs.
This approach can make the final gallery more meaningful because viewers experience the setting rather than seeing isolated animal portraits.
Photograph the Journey Responsibly
The trek itself can provide valuable photographic opportunities, including forest vegetation, trails, landscapes, local communities where appropriate, and other non-sensitive elements of the journey.
Photography should always respect local people, cultural expectations, protected-area rules, and any restrictions communicated by guides or authorities.
Use Photography to Promote Conservation
Gorilla photographs can help audiences understand why these animals and their habitats deserve protection.
UWA describes conservation, sustainable wildlife management, community participation, and tourism development as interconnected parts of its mandate.
UWA also states that revenue-sharing initiatives provide benefits to communities around protected areas.
This means responsible photography can contribute to a wider conservation story when images are published accurately and respectfully.
Be Accurate When Publishing Gorilla Photographs
Photographers should identify photographs honestly and avoid exaggerating what occurred during the encounter.
If a photograph was made under controlled wildlife-viewing conditions, it should not be presented as an image captured by approaching or interacting directly with a wild gorilla.
Do Not Encourage Irresponsible Photography
Photographers have a responsibility for the behavior their images may encourage.
Photographs showing people violating wildlife rules should not be promoted as examples of how visitors should behave.
Images should reinforce the importance of distance, patience, conservation, and respect.
Consider Gorilla Photography Beyond the Camera
The experience should not be measured only by the number of photographs captured.
Watching a gorilla family naturally interact, observing the forest ecosystem, listening to the sounds of the environment, and understanding the conservation effort are all important parts of the experience.
What Should You Do After the Gorilla Trek?
Once the trek is complete, protect the memory cards, back up important photographs, clean and dry equipment appropriately, and review the images later on a larger screen.
Avoid deleting photographs simply because they do not look perfect on the camera’s small display.
Back Up Your Gorilla Photographs
For important assignments, maintain multiple copies of photographs as soon as practical.
A professional photographer should ideally avoid having the entire project stored on a single memory card or single storage device.
Edit for Quality Without Misrepresenting the Encounter
Normal adjustments such as exposure, contrast, cropping, color balance, sharpening, and noise reduction can help present wildlife photographs effectively.
However, documentary photography should preserve the essential truth of the scene and should not digitally manufacture behavior or circumstances that did not occur.
Build a Balanced Gorilla Photography Portfolio
A strong portfolio should demonstrate more than technical camera performance.
Include photographs showing behavior, personality, habitat, environmental conditions, family relationships, and the wider conservation story.
Such a portfolio demonstrates that the photographer understands wildlife rather than simply photographing an attractive animal.
How to Prepare One Week Before Gorilla Trekking
One week before the trek, test every camera and lens combination you intend to use. Charge and test batteries, inspect memory cards, check rain protection, clean the lenses, and confirm that your camera bag is comfortable.
Practice photographing moving subjects in low light so that autofocus and exposure decisions become familiar.
How to Prepare the Night Before
Charge all batteries, prepare memory cards, pack rain protection, clean the camera and lenses, organize spare batteries, and place the primary camera configuration somewhere easily accessible.
Do not leave essential equipment preparation until the morning of the trek.
What to Do Immediately Before the Gorilla Encounter
Before reaching the gorillas, confirm that flash is disabled, the camera has sufficient battery power, the memory card has enough capacity, and the lens is appropriate for the expected photographic conditions.
Listen carefully to the ranger briefing and do not allow photographic excitement to distract you from the wildlife-viewing rules.
What to Do During the First Few Minutes
Observe before shooting continuously.
Identify where the gorillas are positioned, evaluate the available light, watch their movement, and determine which focal length provides the best composition from the permitted position.
Then begin photographing deliberately rather than randomly.
What to Do When the Light Changes
Forest light can change rapidly as clouds move or the gorillas move between vegetation and open areas.
Adjust ISO, aperture, shutter speed, or exposure compensation as necessary while maintaining awareness of the subject.
What to Do When a Gorilla Moves
Do not chase the animal.
Follow the ranger’s instructions and photograph from the permitted position. If the gorilla disappears behind vegetation, wait and observe rather than attempting to force a better angle.
What to Do When the Encounter Ends
Stop photographing when the ranger indicates that the viewing period has ended.
Do not attempt to extend the encounter because you want one more photograph.
Respecting the viewing limit is part of responsible gorilla tourism.
Gorilla Photography: The Most Important Principles
Prepare before entering the forest. Use appropriate equipment. Understand low-light photography. Carry weather protection. Maintain the required distance. Never use flash. Follow the ranger. Do not disturb vegetation. Do not attempt to attract the gorillas. Respect other visitors. Protect the forest. Photograph natural behavior. And always place animal welfare above photographic ambition.
Why Patience Is the Most Valuable Photography Tool
A camera can capture a moment, but patience helps the photographer recognize the moment worth capturing.
Waiting for a gorilla to naturally look toward the light, interact with another member of the family, emerge from vegetation, or display a meaningful behavior can produce photographs with much greater storytelling value than continuous shooting.
The Best Gorilla Photography Is Ethical Gorilla Photography
Technical excellence and ethical wildlife photography should work together rather than compete.
A photographer who understands camera settings can adapt to difficult light without flash. A photographer who understands composition can work around vegetation without disturbing it. A photographer who understands wildlife behavior can anticipate moments without attempting to control them.
Final Conclusion: Photograph the Moment, Protect the Experience
Gorilla photography in Uganda offers an extraordinary opportunity to document mountain gorillas in their natural forest environment, but the responsibility of the photographer is greater than simply producing beautiful images.
The most successful approach combines technical preparation with patience, observation, responsible equipment selection, weather readiness, accurate photography, and strict respect for wildlife regulations.
UWA’s current guidance establishes a maximum one-hour viewing period for normal gorilla tracking and a maximum four-hour period for the Gorilla Habituation Experience. UWA’s published rules also prohibit flash photography and require visitors to maintain the prescribed distance from gorillas.
For photographers, these limitations should not be viewed simply as restrictions. They encourage a more thoughtful approach to wildlife photography. Instead of attempting to control the encounter, the photographer learns to anticipate natural behavior, work with available light, use appropriate focal lengths, and make every photograph count.
The verified Uganda gorilla photography guide provides an additional destination-specific reference, while the verified Uganda gorilla filming guide addresses aerial filming considerations separately.
Photographers can also consult Bwindi travel information when preparing the broader trekking experience and the verified Bwindi gorilla trekking guide for additional destination information.
For equipment planning, the verified gorilla photography equipment guide provides further reference material, while gorilla trekking cultural guidance provides additional context on responsible behavior around gorillas.
Ultimately, the goal is not simply to return home with hundreds of photographs. The goal is to return with photographs that accurately communicate the intelligence, personality, family life, and forest environment of mountain gorillas while demonstrating respect for the animals and the conservation system that protects them.
The best gorilla photograph is therefore not merely the sharpest portrait or the most dramatic composition. It is an authentic image captured without compromising the welfare of the gorilla, the integrity of the forest, or the principles of responsible wildlife tourism.